
Suitable for adults. For any questions contact us via email
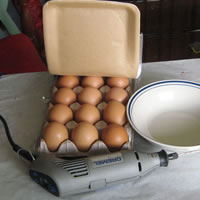
What you will need:
- Raw eggs
- Dremel
- Tiny diamond grinding tip
- Pencil
- Very small file
- Pin
- Bowl
This is quite a tricky craft to attempt, but can be done with ease if you take the time to let your eggs harden before you try to making holes in them.
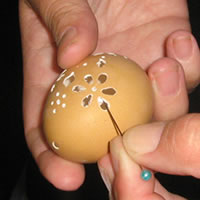
Step 1
Using a pin, scratch a small hole in the top of the egg to make a place to rest your drill bit so that it does not slide around while you are trying to drill.

Step 2
With a small, standard dremel drill bit, now make a hole in the top of the egg so you can the yolk and white inside. You will also need to make a hole at the bottom of the egg so that you have an air hole. If you try to remove the yolk and white without making a hole on the other end of the egg you are going to have endless problems!

Step 3
Once you have a hole on either side of the egg, blow the inside out into a bowl. You need to blow into the egg with quite a bit of strength.

Step 4
Wash the eggs in water, and then leave to dry and harden for 3-4 weeks. If you don’t let it dry out completely, the egg may crumble when you try adding fine detail.
Step 5
Place the diamond tip dremel bit and start grinding your pattern into the shell. Take your time and work with care, or you may end up breaking the shell. You can trace your design onto the egg first, if you are not confident enough to work freehand.

Step 6
Once you have completed the design, you will still have bits of membrane stuck on the inner edge of the shell. Use a pin or a very fine file to file off the edges.
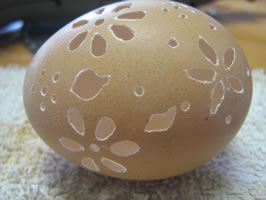
Step 7
Your egg is now complete. Leave it as it is and put it in a basket, or paint it for Easter.
