Decra Lead Windows
Step by step on how to decorate windows using decralead, presented by Crafty Corner
For any question contact us via email

Decra Lead is used extensively as a quick and easy way to decorate windows or glass. The lead is toxic and we strongly recommend that you wear latex gloves when working with this product. Lead is only harmful if ingested or if it comes in contact with the skin for prolonged periods. Once the lead is on the window it will not cause any adverse effects. DO NOT EAT WHILST WORKING WITH LEAD.
What you need to make decra lead windows:
- Decralead
- Pewter tools (optional)
- Glass
- Vinegar
- White Board Marker
- Design
- Scissors
- Latex or rubber gloves
Read through all the instructions first before starting this craft.

Step 1
Clean the entire surface of your window or glass. Make sure that the surface is free of oil and any other residue.

Step 2
Plan the design on your window. Use a whiteboard marker to draw your design on the glass. Once you have completed your design you will commence working on the other side of your glass. This will prevent the design being erased while you are working, and it will make sure that you do not trap the marker between the window glass and the lead. Should this happen the drawing will remain on the outside of the glass and be permanently visible.

Step 3
If you have windows like those shown in the diagram you will need to consider the appearance of the design when the windows are in an open or closed position. If the window is open the design must not overlap too much otherwise it will start to look messy.
Draw your design on the top panel and then open the window. You can now join the lines and add leaves and stems where they are required. As you will be working with a white board marker you will be able to wipe off and re-draw the designs.
All I have done here is the basic structure of a stem, leaf and flower. At this point you do not need to have the exact image as your are only doing the design structure.

In the image above you will see how the leaves drawn on the bottom panel now form part of the overall design. This takes a bit of practice. You need to make sure that when the window is closed that the design appears to be complete.
Step 4
Now you can define and complete the design. Take your template leaves and flowers facing the wrong side and place them on the right side of the glass. Use Tac Tac (reusable glue found on PostIt stickers) or Prestik to secure the corners. Now erase your structure design and trace the perfect leaf image from your template.

Step 5
You now have the flower or leaf that needs to be duplicated into the required position. Choose the thickness of decra lead that you need for this part of the design. Peel off the sticky paper backing. The finer and more curved the design, the thinner the decralead that will be required. If the lead is too thick it will not be pliable. Bending the lead takes a little practice. Start off by choosing a straight section of your design.

Step 6
Place the piece of lead down on the glass. With the black plastic applicator(supplied with the Decra Lead pack) gently rub the lead down so that it is smooth and flat on the glass. Once you are sure that it is flat and stuck down properly, you need to give it a firm rub. This is to make sure that the lead adheres to the glass and will not peel off.

Step 7
You will need to rub the edges of the lead strip to ensure that they are stuck down. Now the lead needs to be bent so that it appears to be part of the glass and not just glued on top. You must not be able to see the thickness of the lead and that it has been glued onto the glass. The more you work the edges the more authentic the appearance of the finished product will be.

Step 8
It may be easier to use the pewter tools rather than the plastic applicator. Flatten your pieces and the edges as much as possible.

Curved pieces
When working on a curved section do not manipulate the lead too much as this tends to make the glue on the back deteriorate and the piece of lead unusable.
Before peeling off the paper from the back, warm the strip by working it gently in a bending movement.
Peel and stick one point down and hold it down firmly with your finger. Gently bend the other section to your design and stick it down. This step requires a lot of practice and patience. If the lead is very lumpy press it down gently with the plastic applicator. Press from the top, directly down, do not rub them to the side.
If a piece does not stick immediately give it a few minutes for the glue to adhere properly and then rub it and flatten the edges. Should the piece still not stick then you may have to discard it and use a new piece.

Leaves
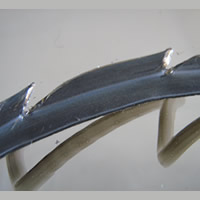
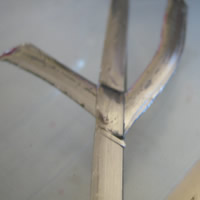
If you look at the leaf in the diagram you will notice that I have cut a V shape out of the side. This gives the appearance of spikes on the edge of the leaf and also assists with the bending process. Should you wish to make a smooth leaf rather use a thinner lead and do not cut slits into it.

Overlaps
When working with small pieces or disjointed sections, try and lay the loose bits down first and then "tie" them together with another lead strip over the top. This will help to secure the pieces and keep the design together. An example of this would be the veins on the leaves.

Step 9
Continue with your design following the rules above.
Step 10
Once the entire design has been completed check for pieces and sections that may have not adhered properly.
Leave the window to stand overnight.
Step 11
Wipe your design over with vinegar. This must be used sparingly and you do not want any liquid to drop on the glass. Unfortunately vinegar makes the glass oily even though it appears to be doing just the opposite. Vinegar is rubbed onto the lead to remove the shine, correct the colour and it helps to conceal some of the rub marks.


