
Step by step on how to make a glass painted acetate Christmas tree, presented by Crafty Corner
For any questions contact us via email

This tree is very colourful and quite easy to make, an ideal way to keep the kids busy during the Christmas holidays. With your assortment of Christmas decorations done on acetate, you can decorate any window for that special time of year in just seconds.
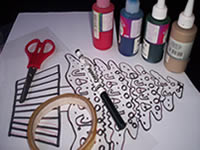
What you need to make a glass painted Christmas tree:
- Acetate
- Scissors
- Water based glass paint (green, red, yellow, blue)
- Liquid Lead (gold)
- Pattern of tree
- Toothpick
Read through all the instructions first before starting this craft.
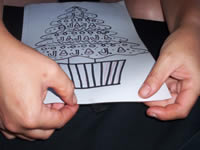
Step 1
Print out the Tree Pattern (or design your own!) and sellotape the design onto the acetate sheet to keep the pattern in place.
Step 2
Trace the tree with the liquid lead marker, making very sure you build a nice thick wall for the glass paint to fill into.
Tips
Sometimes the liquid lead can be quite hard to work with, so before you start, turn the bottle upside down for the lead to run to the tip of the bottle. You don’t want to be spending all your energy squeezing the bottle and doing this helps.
All the joins must be closed up properly and the lead must be raised up nicely. The best way to apply the lead is to hold your bottle at a 45˚ angle.
Lean the tip of the bottle on the acetate and work away from the line you are tracing.
Don’t try to hold the bottle in the air as this makes your hand unstable and the lead tends to come out in blobs rather than a smooth line. Work away from the lines you are tracing and take care not to lean on your work.


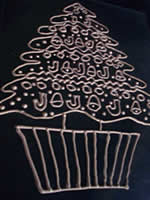
Step 3
Once you have traced the tree with your lead and made sure that there are no gaps for the glass paint to run out of, remove the paper backing and leave the liquid lead to dry on the acetate for at least four hours.
Step 4
Lay a piece of white paper down or work on a white surface. Place your sheet of acetate with the liquid lead Christmas tree on the white paper or white working surface.
Tips
Turn your bottle of glass paint upside down and let the paint run to the tip without pressing the bottle. If you press the bottle it tends to cause bubbles.
Your Christmas tree is now ready to be filled with glass paint. Start with the little bits like the balls and stockings on the tree. The glass paint will start to come out the bottle as soon as you have removed the lid so you need to work quite quickly so as not to mess. Instead of squeezing the bottle of glass paint, rather let it run out the bottle on its own.
If you mess paint it is easier to let it dry completely and peel it off rather than trying to wipe it up.
If you do get bubbles, leave them to dry a little and then use a tooth pick to pop them. Don’t let the paint dry too much or it will not be runny enough to run into the space of the popped bubble.
Drip the paint into the area you want to paint and let it well up quite a lot. The paint evaporates when dry so it will flatten out. Fill the area up so as not to have a splotchy finish when the paint is dry.
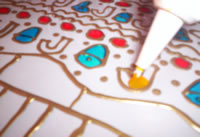
Step 5
Use a tooth pick to push the paint around, tracing the inside of the lead. Doing this helps to make sure you don’t have spots that are not covered properly.

Step 6
It is recommended that you leave your work to dry again at this stage, as it gets quite hard to fill in the entire tree without touching it and messing it.
Step 7
When the little bits are dry (about two hours), fill in the main colours.
Step 8
Leave the glass painted Christmas tree to dry.
Step 9
Cut out the tree using a sharp craft knife or scissors. Wet the back with dish washing liquid, press it to a clean window and it will stay there until you remove it.