

Mosaic Orange Flower Table
Step by step instructions showing how to make your own mosaic orange flower table, presented by Crafty Corner
For any questions contact us via email
There are so many great mosaic projects out there. We had this old wooden table and wondered what to do with it. So, for one of our next mosaic projects we decided to mosaic it and see how it would come out.
If you have something old lying about, don't throw it away, rather see if you can make it into something new for one of your next mosaic projects!
What materials you need to make a mosaic flower table:
- Round table top
- Orange tiles
- Mix of red & brown tiles
- Mirror
- Flower pattern, either free hand or printed
- Two wheel tile nipper
- Wood glue
- Tile grout
- Water
- Mixing tub
- Hard foam or old credit card to use as grout applicator
- Ice cream stick
- Sponge or cloth
- Old dry towel or cloth
This is quite an advanced step by step. Before attempting this, it is a good idea to follow the instructions on some of our other mosaic projects. Both the Mosaic Baobab Placemat as well as the Mosaic Teddy on the Moon have great, detailed instructions for you to follow and familiarise with this wonderful craft.
Step 1
Print out the design you wish, and use carbon paper to trace and copy out the design onto your board (table top). Ensure that your design has been properly transferred before starting. With the smaller print out, colour in your design, so that you are certain where all of your intended colours are going.
Step 2
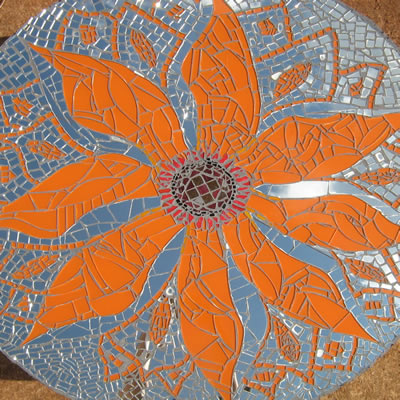
You will see that we have used two shades of mosaic brown tile for the centre of the flower, a darker, almost black ring of smaller mosaic tiles to surround the centre. Elongated red tiles are used to lead the eye and visually tie the centre of the flower to the petals.

Step 3
With your design marked onto the table top, you can easily apply the glue to sections and work by colour. We have primarily worked with orange mosaic tiles and mirror to make up the flower design.


Step 4
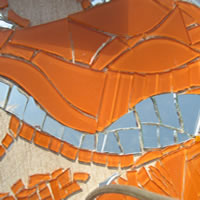
What is important to note in this mosaic project is the use of varying shaped and sized pieces of tile. You should see that we have cut larger pieces of orange tile to shape the flower petals. This allows for a smoother, flowing line and shape. Within each petal, there is an area of mirror Here you will see that these pieces have been cut and shaped similarly, for that overall free flowing effect on the eye.

Step 5
Along the outer edge of the table top, the pieces of tile and mirror are smaller and therefore create a visual boundary between the flower and the background. This provides greater depth and definition to the image.

Step 6
Hopefully we have helped you to see that you can, not only use colour, but shape and size, to add interest to your mosaic projects. Creating something with further depth and visual intimacy.
Once complete, we applied grout to the entire surface of the table top. We used grey and we felt it would complement the mirror and better define the subtle lines in this work.

Step 7
Once you have wiped off the excess grout and buffed the surface, your orange mosaic flower table is ready to be used.
NOTE: For such a mosaic project where mirror is concerned, keep in mind where the table will be used, as the mirror reflects the sun beautifully outdoors... but is harsh on the eyes!