

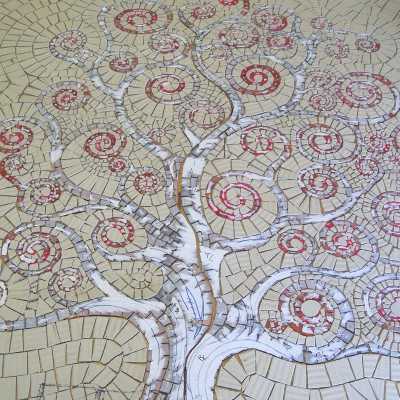
Mosaic Tree of life
Advanced step by step instructions showing how to make and install a mosaic tree of life, presented by Crafty Corner
For any questions contact us via email
This is a great, advanced step by step to create a beautiful mosaic for your home, brighten up your a wall or create a unique splash back for your kitchen or entertainment areas
Follow our step by step instructions to see how to make your own mosaic tree of life

What you need to make and install your mosaic tree of life:
- Mosaic design, drawn to scale on paper
- Mosaic tiles
- Wood glue
- Tile grout
- Oxide to colour grout
- Chipping hammer
- Sponge
- Wall tile trowel
- Old dry towel
In this project you will notice that we have had to take extra long steps in creating the design as we were faced with two challenges namely that the mosaic tiles we were using for the project were all white on the back so we could not see the design and that the tiles were of two thicknesses, the standard glass tiles and the other was ceramic floor tiles. This project was done not on mesh due to the different thicknesses.
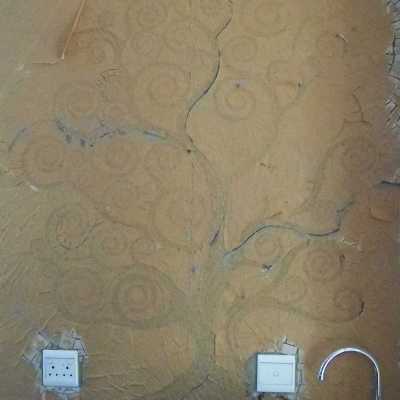
Step 1
Create your design by either printing it onto multiple sheets of paper and joining them or if you prefer just join the sheets of paper to the size you wish to make the mosaic and then draw the design directly onto the paper. Make sure that your design is about 2-3cm smaller than the completed area. This is to allow for movement and adjustments of the design during the installation process.
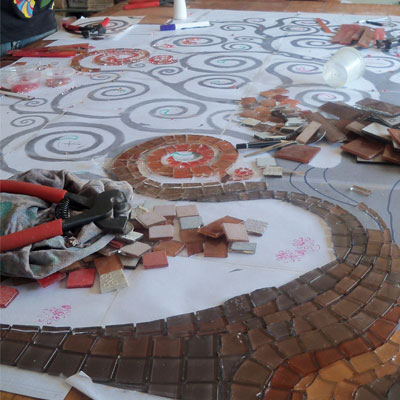
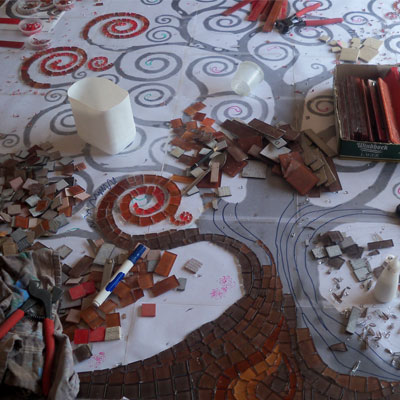
Step 2
Starting as in this particular case with our thinner coloured tiles we glued them to the deign using wood glue face up so that we could see the final product item without the background which was to be done in the single colour thicker floor tile.
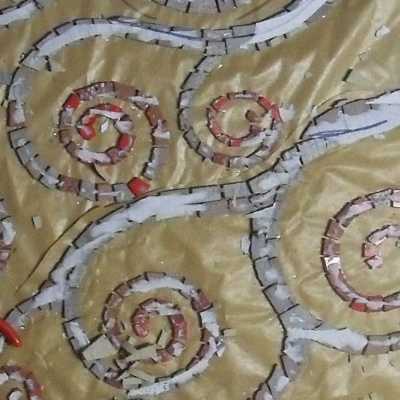
Step 3
Once you have completed your design with the thinner tiles you will need to let it dry, make sure every! bit is glued before moving the design to one side as you are going to be flipping it over so that you can go onto the next step. We suggest cutting the white paper into easy to handle sections. This is particularly important when you are doing this with a small team or by yourself.
Step 4
Moving the design peaces to one side lay out brown paper to the same size of the area of where the mosaic is going to be installed. In order to centre the mosaic draw a frame border on the brown paper the full size of the area in which the intended mosaic is going to be installed. Now draw a second line about 3cm smaller than the final design
Step 5
Now take the mosaic you have created and place it upside down onto the brown paper. Once you have placed all the sections onto the paper and have adjusted it to be in the centre or off centre if that is the final design. Lift each section one at a time glue the face of the tile and replace it in the exact position.
Note: Do not glue the sections to the brown paper till you have the complete design in place and remember that from this point onwards you are working in reverse so if you want the design off centre you have to move it to the opposite direction on the paper to that on the wall.
Step 6
Taking a semi wet sponge, not dripping, wet the back of the white paper so that it becomes translucent. Do not make it to wet or it will soak though to the brown paper underneath. Leaving it for about 10 to 15 min but making sure it is wet the wood glue will soften and you can pull off the white paper.
Step 7
Now cut the brown paper in to the same sections you had for the white. This will help you greatly with the actual installation as well as determining the join points when you are laying out the background. You can now start to cut, glue and lay the background mosaic into place till you have completely filled the background. At this point the face of your mosaic is all one level and the side you are looking at is 2 different levels. You cannot glue mesh onto the back as this will then pull the final work out into 2 different levels again during installation.

Step 8
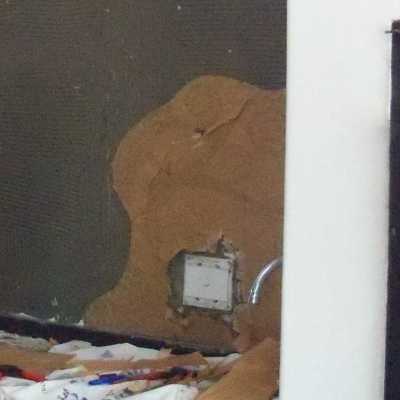
Now you have to prepare the wall for the installation of the mosaic. Firstly makes sure that there is no loose plaster or paint or the tile cement will just pull free. Next using your chipping hammer and chip the plaster, this is particularly important is the wall is painted.
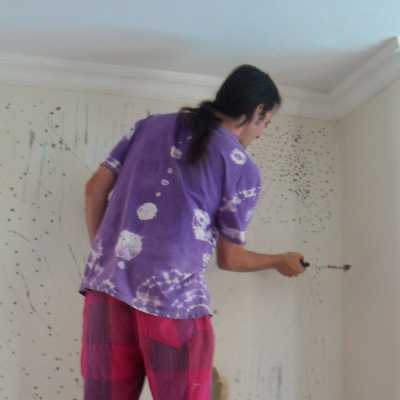
Step 9
Now mix up the tile cement to the consistency of tooth paste. Do not rush as the cement does take a little white to dry, first thoroughly wet the wall to slow down the drying process. Now using your tile trowel, these you will recognise as two edges will have square teeth cut into them, cover the wall with tile cement. Using the square teeth side of the trowel you now level off the cement so, that is the purpose of the teeth.

Step 10
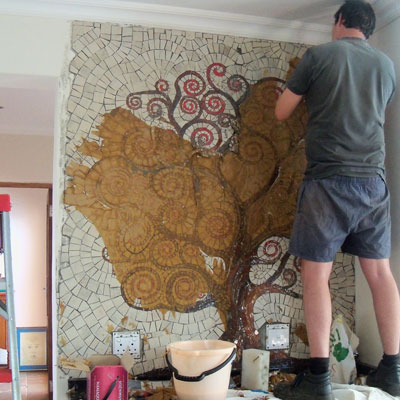
Starting from the lowest section of the design place your brown paper covered sections of mosaic against the wall onto the cement, brown paper outwards. Press them firmly into the cement but do not press to hard as you will distort the surface and you will end up with different levels as you cannot pull this off once it is in place. Install one section at a time and do not rush.
Step 11
One you have placed all the sections take a flat length of wood place it against the face of the mosaic, carefully using the mallet tap the wood so that you are hammering the mosaic into place. this will result in the mosaic been more firmly set into the cement, and levelling the entire art work at the same time preventing you from forming a uneven surface if you were using your hands.
Step 12
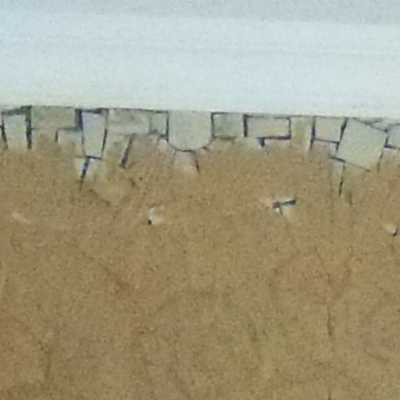
Wait for about an hour or two before you do this next step. Remember the 2-3 cm that we left in the original layout, carefully pull back the edge of the brown paper on the surround edge of the mosaic. Now you can cut and fit the edge bits into place. Make up some fresh tile cement you will then glue these bits into the edge so that you get a smooth edged border. Now you have completed the installation leave this in place for 24h to set
Step 13
Take a sponge and wet the brown paper as you did to the white paper in the earlier step. You do not have to worry about getting it to wet as you now want all the paper off. Between wetting and been able to remove the paper you will have to wait about 10 - 15 min. You have to remove ALL bits of paper or while grouting any little bits will get mixed into the grout and cause problems when you are polishing.
Step 14
Now you need to mix the grout, in this project we decided on a deep brown colour. This you do by purchasing the colour oxide you want to use and mix it in while you are mixing the grout. You want the grout to have the consistency of tooth paste. Taking a plastic or foam scraper cover the entire mosaic in grout, making sure that you get into every crack and cranny. You must pay close attention and look for any loose bits so that you can re-secure them so nothing falls out in polishing or ever. Leave the grout to dry for 24h before you try to clean it up

Step 15
Taking a scouring pad, a plastic one so as not to scratch the mosaic surface, you can now scour off all the excess grout, use lots of water it helps. Once you have removed all the excess grout you can let it dry. After the finally drying you take a dry towel and polish off the residue powder.
You have now finished and installed your mosaic.
