Mosaic Flower Mirror
Step by step on how to make a beautiful mosaic flower mirror, presented by Crafty Corner
For any questions contact us via email

What you need to make mosaic mirror:
- Orange mosaic tiles
- White mosaic tiles
- Mirror
- Masonite board
- Wood glue
- Dark grey grout
- Two wheel tile cutter
- Flower design
- Carbon paper
- Pencil
- Mirror pieces
All requirements can be obtained through Crafty Corner.
Read through all the instructions first before starting this craft.
Step 1
Using your design select one basic flower. Make three copies of the flower design, copying it in three different sizes.
Step 2
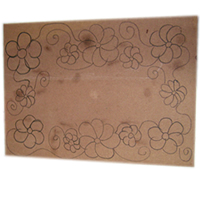
With your masonite board in front of you, plan your design on the board. Put a big flower copy in each corner. Add a middle sized flower copy between each big flower and add two or three small flowers scattered between them. For the blank spaces draw swirls to intertwine the flowers.
Step 3
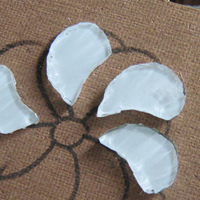
Draw the design of the flower petals onto a 5 by 5cm white tile. You can use either a permanent marker or a white board marker. Ensure not to touch the drawn petals and this could ruin the petal shape. Draw carefully.
If using a permanent marker, note that ink should wash off when you are doing the grouting, for stubborn ink marks wipe down with methylated spirits.

Step 4
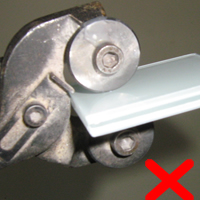
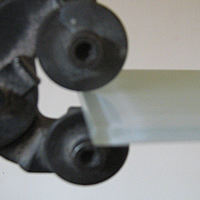
When the petal designs have been drawn, cut out the petals using a two wheel tile cutter. The best way to do this is to make sure the end of the tile is resting between the tile cutter circles.
Donít place tile into the tile cutter as in the picture below left, rather place it on the edge of the tile and slowly chip away as in the picture on the right.
Step 5
Cut enough petals for all of your flowers.
Step 6
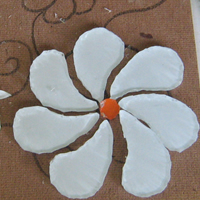
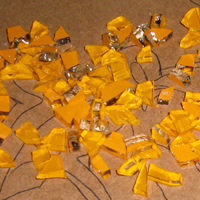
Once you have all the petals of your flowers, proceed to cut out orange circles for the centre piece of your flower. We suggest that when you cut the orange circles that you cut out small random shaped pieces of orange at the same time for the background of your flower mosaic.
Step 7
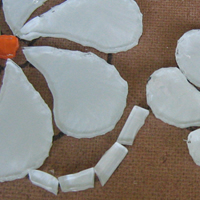
On your masonite board, start gluing the white petals of the flower design first, as these are the biggest pieces and easiest to place. When complete with the white petals, your second step would be to paste orange circles and petals around it.
Place the swirls and use slivers of the white tile to create the stems.

Step 8
When you have completed sticking the mosaic pieces of your flower design onto the masonite board, glue the mirror into the middle of your flower design straight onto the masonite board. It is best to leave a 3 Ė 4mm space between the mirror and flower design.
Step 9
Complete the background with the orange mosaic tile pieces. Use the smooth edge of tiles to line the edge of your mosaic.
Step 10
Leave overnight to dry, and then refer to Step 13 of the Teddy Bear on Moon craft to complete the grouting.
We have used grey grout for this project because the petal colours of the flowers are white and we want the petals to stand out and not be lost. If you used a different colour for the petals, the grouting can be white.
Step 11
Your white and orange flower mosaic mirror is now complete!


