Polymer Clay Leaf
Easy step by step instructions showing you how to make your own polymer clay leaf, presented by Crafty Corner
For any questions contact us via email
Polymer clay is a great way to keep your hands busy, and it is possible to come up with the most incredible designs! Follow our easy step by step instructions and learn how to make a leaf using polymer clay.
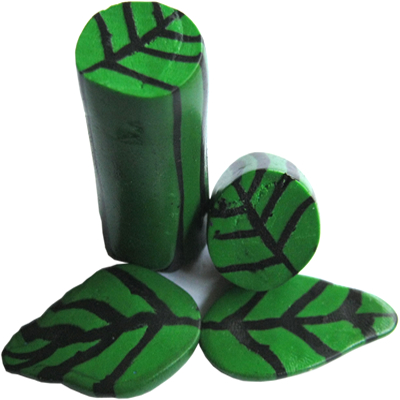
What you need to make a polymer clay leaf:
- Polymer clay (green and black)
- Pasta maker
- Metal pipe or rod
- Stanley knife blade (full length)
- Damp cloth
- Sheet of glass or mirror to work on
- Oven
This is a fantastic beginners craft for young sculptors. We will be making polymer clay leaf beads, using the cane technique. Polymer clay is PVC based product with liquid plasticizers which keep the clay manageable and soft until baking – which can be completed in a house-hold oven.
Step 1
Open your green polymer clay packet and break off just under half. Seal the rest of the packet, as if left open the polymer clay will slowly harden and be harder to work with next time. Work with the polymer clay a bit and play with it so that it gets nice and soft and easy to use. Even if it is hard and seems unmanageable it will often soften up when played with.
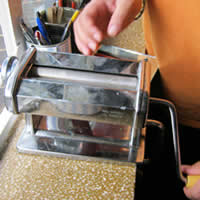
If you have one, you can use a pasta machine to assist you. You will do so by either rolling the clay into longer rolls or making small, flatter square shapes and then feeding these through the pasta machine repeatedly.
Step 2
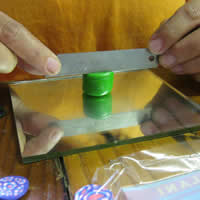
Now that the polymer clay is softer, roll it with your fingers and hands to form a fat cane roll. It should be approximately 1/2cm in height and the same width.
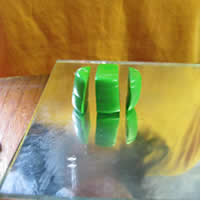
Once you have your roll, use the Stanley knife blade or a razor blade to slice the polymer clay into three sections.
Step 3
Work the black polymer clay until it is soft and manageable. Create a flat rectangular section using the pasta machine to assist you.
Now shape a short rectangular section, which you will feed through the pasta machine, to acquire a even width rectangle.
Step 4
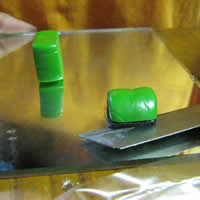
Place this section of black on the working surface. Place the semi-circular section of green polymer clay on top of the black, flat side down. Use your blade to trim the excess black from around the green polymer clay.
Use your blade to lift this section, causing the least amount of distress to the clay.

Step 5
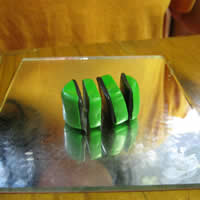
Cut the middle section into two equal sized parts and repeat this process of sticking a black layer onto each, except for one of the middle section pieces.
In our image, you will see that the left hand side middle piece does not have a black layer.
When all the pieces are together again, there should be a black polymer clay layer between each section.
Step 6
With all four pieces now ready, you will position them back together, in order, to create the same shape as before cutting the polymer clay in Step 2.
Step 7
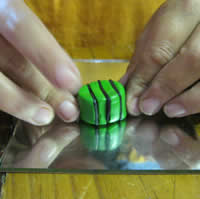
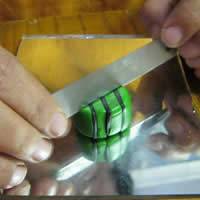
You will now cut this circular shape down the centre. Making sure that the black lines are running straight, horizontally, your cut should then then be made vertically.
Step 8
With the two halves now, turn one around and lay it next to the other again. This will visually create the effect that the black lines are running in a "V" shape.
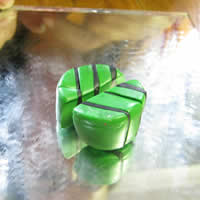
Step 9
Place a thin layer of black between the two halves, and then push them together. You want to work these two halves together again to get the fat cane roll from Step 2.
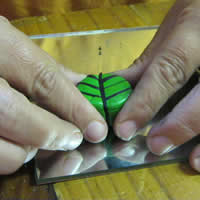
Step 10
Slowly roll this, on its side, starting from the middle and gently working your way to outer edges. Roll carefully and slowly, basically what we are doing here is taking a short, fat roll, and slowly stretching it into a long, thin roll. Do not worry about the loss of pattern at the sides, it will always disfigure.

Step 11
To cut the cane, use the blade and roll this from left to right across the cane. Allow the cane to roll with the blade as you gently press down. This will help to keep the shape and colours from mixing as you cut the polymer clay. You can cut the sections as wide or thin as you like, for a thick or thin leaf.
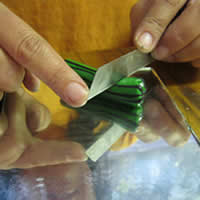
Step 12
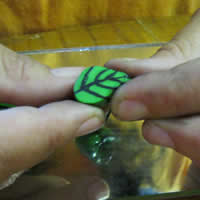
Once the entire cane has been cut, all that remains is for you to gently form each circle into the leaf shape. Use your fingers to lightly pinch the two heads of the "V", keeping the point of the "V" rounded.
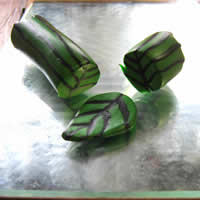
Step 13
You will leave your cut pieces of cane to dry overnight and then place in the oven the following day. Bake for 15min only, at approximately 140 degrees Celsius.
The polymer clay will set and be very hard after baking.
TIP: Should you wish to make beads, we suggest making the hole after baking as this will inhibit you less when deciding which beads you need for a project. If you have a set beading project and you know where and how each bead will lay, then by all means make the holes while the polymer clay is still soft.


