
Suitable for adults or under adult supervision. For any questions contact: Mark
The casting resin we used for this project is an unsaturated polyester resin. Essentially the resin is a thick liquid which sets and hardens when you add a small amount of catalyst, normally around 2%. Adding more catalyst will make the resin set very quickly and make it hard to work with the resin properly. Adding too little catalyst could cause the resin to not set or cure properly, so it is important to try get the amount of catalyst as close to the manufacturers’ guidelines as possible.
Unsaturated polyester resin is great fun to work with. The resin is clear, and you can add all sorts of decorations, such as glitter, or even seashells for a dazzling effect. As resin sets it heats up to about 70 deg.C, so you can mix virtually anything into the resin as long as it is dry (no moisture) and can withstand some heat.
In our project we added chalk powder. As casting resin is fairly expensive, we used chalk powder to bulk the resin so that we could use less. The chalk powder will also add some strength to the finished product. We also wanted a solid colour, and as the resin itself is transparent, the only way to achieve this was to add a white base such as chalk to the resin.
What you will need:
- 30g casting resin
- 20g Kulu White (chalk powder)
- 1g Catalyst
- Red Pigment
- Mould, preferable silicone rubber
- Screw
- Small spatula or flat stick
- Electronic scale

Step 1
Measure 30g of casting resin using an electronic scale. It is important that you know exactly how much resin you use as you need to mix in the correct percentage of catalyst later on.

Step 2
Mix in your Kulu white. This is a chalk powder that we use to not only strengthen the resin, but to also bulk the resin so that you can make your object cheaper to cast. You can use up to 80% in your resin. In this project I am going to use 20g and add it to 30g resin.

Step 3
Now you need to mix in your Kulu chalk powder. Try not to get air bubbles in, so stir thoroughly without folding the mixture or using a rough chopping motion.

Step 4
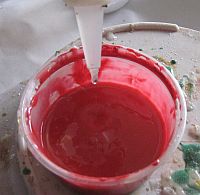
Measure out a very small quantity of red pigment (a little goes a long way!) and thoroughly mix this into your casting resin mixture.


Step 5
Let your mixture stand for at least half an hour, this will help reduce the amount of bubbles you have in your mixture. If you watch the resin you can actually see air bubbles rising up out of the solution and bubbling at the top of the resin mixture
Step 6
Take a little of the resin mix, less than 1tsp and scrape it onto the centre of the silicone rubber mould and add a drop of catalyst. Mix with spatula and leave it to set till it is tacky. The reason for doing this is so that you can add a screw to the mould in such a way that it will not be visible from the front.

Step 7
After 10 – 15min the resin should be firm but still tacky. Place a screw onto the resin and leave for a further 15min to set. This will hold the screw in place when you finish filling the rest of the mould.

Step 8
Take the rest of your prepared resin and add 2% catalyst to the mixture. It is very hard to judge accurately with this small amount, I’m going to use 1g. Mix slowly and thoroughly so as to minimize the amount of bubbles that will be created in the resin.
Step 9
Working quickly, pour a little resin into the silicone rubber mould. Use your spatula and smear the resin around the sides of the mould, making sure to work it into the intricate points to help prevent air pockets from forming on the surface of the mould.

Step 10
Fill the silicone rubber mould to the top and leave to set.

Step 11
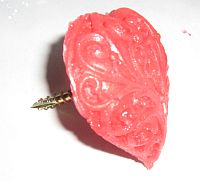
After about 1 hour, the resin should have set and be touch dry. You can now remove the heart from the mould.

Step 12
While the resin is still soft, take a sharp knife and clean off the excess resin around the edge of the item you have moulded to complete your project.

Step 13
Leave for a further 24hrs to allow the resin to set to full strength before you try to use it – in this case we are using our item as a cupboard door handle so it needs to have strength.