
This is a fairly easy beading project that you can do with boys and girls of most ages, 5+. Older kids shBeaded Hanging Charm
A colourful beading project for children of mixed ages
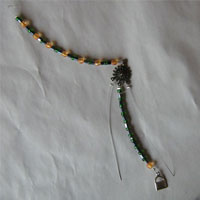
This beaded hanging charm is a fun and satisfying project that works well with both boys and girls. It combines beads, wire, and small charms to create a decorative hanging piece that can be displayed in a bedroom, on a wall, or even on a door handle.
Older children will enjoy managing much of the beading on their own, while younger children can take part by choosing colours and threading beads, with an adult helping where wire cutting and crimping is needed.
Presented by: Crafty Corner
Skill level: Beginner
Age suitability: 5+ with adult supervision
Supervision note: Uses thin wire, pliers, and crimps; adult help recommended for cutting and securing wire
Materials and tools
- Beads in various colours
- Thin wire (approximately 1 mm thick)
- Crimps
- Flat-nose pliers
- Pliers or wire cutters
- Three small charms
- One larger charm with one hole at the top and three holes at the bottom
Before starting, read through all the steps together. Lay out all materials so children can see what will be used and how the charm will come together.
Step-by-step instructions
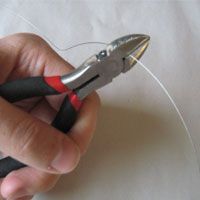
Step 1: Cut the wire
(Adult help recommended)
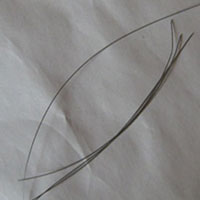
Using pliers or wire cutters, cut:
- Three pieces of wire about 10–12 cm long
- One piece that is a few centimetres longer
These will form the hanging strands of the charm.
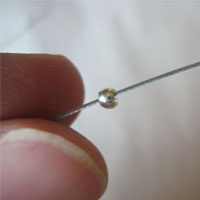
Step 2: Add a crimp to the long wire
Take the longest piece of wire and slide a crimp onto one end.
This crimp will help form the loop that the charm hangs from.
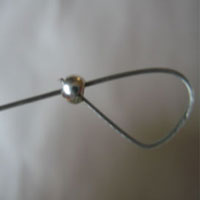
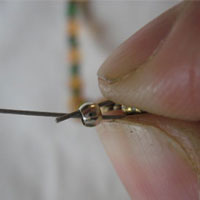
Step 3: Make the hanging loop
Bend the wire over to create a loop. Make sure the loop is large enough to hang over something like a nail or hook.
Thread the end of the wire back through the crimp to hold the loop in place.
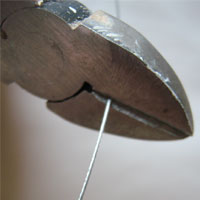
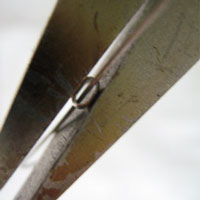
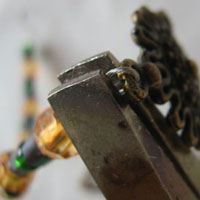
Step 4: Secure the crimp
(Adult help recommended)
Using flat-nose pliers, squeeze the crimp firmly until it is completely flattened.
This step is important — a tight crimp stops the loop from pulling loose later.
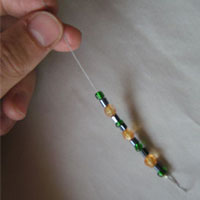
Step 5: Start beading the top strand
With the crimp secured, begin threading beads onto the loose end of the wire.
Let children choose the bead order and colours. Patterns, random mixes, and colour blocks all work beautifully.
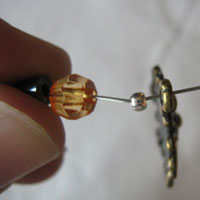
Step 6: Attach the main charm
Stop beading when there is about 2 cm of wire left.
Slide a crimp onto the wire, then thread the top hole of the large charm onto the wire. Make sure the charm is the right way up — the side with one hole should be at the top.
Step 7: Close the top section
(Adult help recommended)
Bend the wire to form a loop, thread it back through the crimp, and then squash the crimp closed using flat-nose pliers.
The main charm should now hang securely from the beaded strand.
Step 8: Add the lower wires
Take each of the remaining three pieces of wire and thread one through each hole at the bottom of the main charm.
Secure each wire in place using a crimp and pliers.
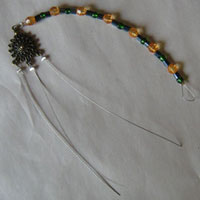
Step 9: Check the shape
At this point, your charm should look like a central piece with three loose wires hanging down from the bottom.
Take a moment to straighten things gently if needed.
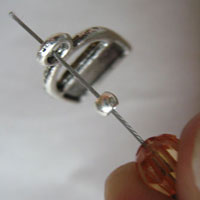
Step 10: Bead the lower strands
Choose one of the hanging wires and thread beads onto it.
When you reach the end, slide on a crimp and a small charm. Bend the wire back, thread it through the crimp, and close the crimp using pliers.
Step 11: Repeat for the remaining strands
Repeat Step 10 with the other two hanging wires.
Each strand can be different — mixing bead sizes and colours adds movement and interest.
Step 12: Finished!
Your beaded hanging charm is now complete and ready to display.
Hang it in a bedroom, near a window, or anywhere that needs a little colour and sparkle.
