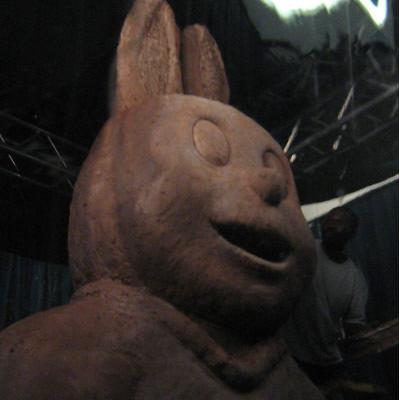
Crafty Corner creates the world's largest solid Chocolate Easter Bunny
It took Crafty Corner 3 days to break the World Record for the largest solid chocolate bunny.
Weighing in at over 3000 kilograms and measuring 3,82 metres high, Crafty Corner broke the previous record by far.

Read more here about the world record attempt
Chocolate Easter Bunny for Kids
Step by step instructions to make a chocolate easter bunny for kids
For any questions contact us via email

What you will need to make a chocolate Easter bunny:
- Microwave safe bowl
- Spoon
- Pegs
- Chocolate mould (two pieces back and front of bunny)
- Melt & Pour Chocolate (can be found at most supermarkets or baking shops)
This craft can be done by children of all ages. We suggest that young children are supervised by an adult as melted chocolate can be very hot. Melted chocolate stays workable for quite some time. Read through all the instructions first before starting this craft and make sure you have all the required items on hand.
Step 1
To prepare your mould, wet a piece of kitchen towel with cooking oil and rub the inner surface of the mould with the oil. This is done to ensure that the chocolate bunny will not break when released from the mould.

Step 2
Place broken pieces of chocolate into the microwave safe bowl and melt in the microwave on a low temperature. You may find that the chocolate appears not to have melted. It may seem solid and then suddenly melt, so stand in front of your microwave and pay attention to the melting chocolate. Do not let it overheat, rather keep checking to see how far the melting process has gone.

Step 3
Remove melted chocolate from the microwave and fill one side of the bunny mould. Gently tap the mould to release bubbles.

Step 4
Place the empty bunny mould on top of the one filled with chocolate. Clip the pegs around the edge to seal the edges and prevent the chocolate from running out.

Step 5
Gently lift up the mould and flip it over. This will allow the second half of the mould to be coated with chocolate.

Step 6
Rotate the mould and allow the melted chocolate to run along the seam on the inside of the mould. This helps to stick the two halves together.

Step 7
Keep rotating the mould until the chocolate has coated the entire inside of the mould and the chocolate is no longer runny.
Step 8
Place the mould inside the refrigerator for approximately three minutes.
Step 9
Remove the mould from the refrigerator. Remove the pegs and open the mould. The bunny should come out of the mould quite easily.

Step 10
Run a warm knife down the sides to melt off the seam lines.


