

Bean Bags
Step-by-step on how to make Bean Bags as presented by Crafty Corner
For any questions contact us via email

What you need to make Bean Bags:
- Rice or lentils, uncooked
- Fabric, 30cm X 15cm
- Fabric glue
- Scissors

Read through all the instructions first before starting your bean bag craft. Make sure you have all required items on hand.
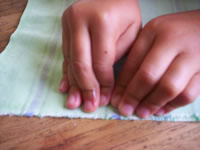
Step 1
Apply a solid line of glue on the front of the material along the two 30cm edges.

Step 2
Fold length-wise so that you now have a 15cm square.


Step 3
Gently press the glued edges together; making sure that the fabric is smooth. Wipe away excess glue with a damp cloth.
Step 4
Firmly rub along the edges that have been glued to ensure that they bind together securely.

Step 5
You can complete the bean bag after waiting an hour, but you cannot play with it until the glue is properly dry. Leave overnight to bind properly.
Step 6
Turn the bean bag inside out.

Step 7
Fill your bean bag with rice

Step 8
Fold the open end edges inwards, apply glue to both sides.

Step 9
Taking hold of the seams, glue them together so that it puts a twist into the bag. Press gently together, working away from the seams so that you make sure that there are no bubbles or folds in the material.

Step 10
Rub the edge firmly to ensure that the glue bonds with the material.
Step 11
Leave it to dry overnight.
Now let's have some bean bag fun!
Having lots of bean bags around the house is always very useful for all those games the kids like to play.
Here are some ideas for games that you can play with your bean bag that help development of good hand / eye coordination.
- Place a ball on the ground with a plank over the ball. Place the bean bag on one end of the plank, and get the child to jump on the other end. Get your child to try to catch the bean bag after it launches.
- Place 2 markers on the ground about 5 metres apart. Then take the bean bag and balance it on their heads. Time how long it takes them to get from one marker to the other.
- Mark out a start and finish line. Place a bucket on the ground. About 1m from the bucket, place a marker. They then have to run to the marker and throw the bean bag into the bucket. Once in, run to the finish line.
- Simply enjoy the bag by throwing it into the air and catching it, or throwing it to each other.