

Tin Bangle
Step by step instructions showing how to make your own recycled Tin Bangles, presented by: Kisma Kreative
For any questions contact us via emailFinally, a creative way to upcycle tin cans into fantastic jewellery for you and your friends! These easy step by step instructions will have you making your own tin bangles for you and your friends!
.jpg)

What you need to make tin bangles:
- A rinsed soda or beer can.
- Rubber mallet and a nail. If you don’t have a rubber mallet, use a hammer and an old kitchen towel.
- A pair of strong old kitchen scissors.
- An ordinary pair of flat nose pliers.
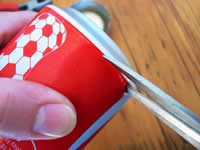
Step 1
Hold the nail in place at the top of the can and tap it with the mallet until it pierces the tin. Gently force the scissors into the hole and cut around the top of the can to remove it. Repeat the process on the bottom end of the can. Be very careful and if you can, wear protective gloves as the raw edges of the tin will be very sharp. It is easy to slip and cut your fingers.
.jpg)

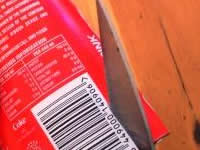
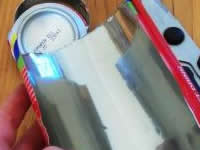
Step 2
Cut the tin tube down one side so that you can straighten it out into a rectangle shaped sheet of tin. Cut the tin into two strips and cut the rough sides if you need to so that you have two neat strips of tin ready to be made into bangles. Decide if you want to use the silver side of the tin strip or the designed side.
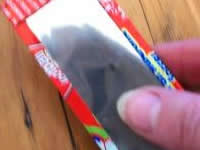
Step 3
Using your flat nose pliers, bend a "hem: along the edge of your can.


Step 4
Lay an old towel out on your work surface and gently hammer the ends down with the rubber mallet. The towel is important for the bangle with the pattern showing, it will stop the paint from chipping. If you don’t have a mallet then place the tin on top of the towel and then cover it with a layer of tea towel and gently hammer the folds down.

Step 5
Using the same process as in step 4, bend the hem over on each side of the tin strip again so that all the sharp edges are folded away.

Step 6
Hem the narrow ends of the strips of tin in the same way. The strip of tin should be completely sharp edge free by the time you are done.
Step 7
Bend a strip of hemmed tin into a bangle. Use a small jar to help you get the round shape and then shape it by hand to get it just right for you.

And there you have it, your very own recycled bangle!