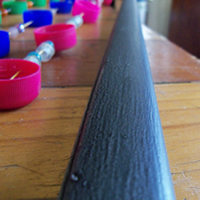
Bottle top frame
Easy step by step instructions showing how to make your own bottle top frame by recycling plastic bottle tops and caps, presented by Crafty Corner
For any questions contact us via email

In this Step by step Upcycle project, we will show you how to upcycle your old plastic bottle tops and bottle caps and an old frame, creating something unique and beautiful for your wall.
Be environmentally conscious and recycle / upcycle to help save your planet! We used old Coca-cola, Fanta, Sprite & Valpre plastic bottle tops in this bottle top beading project.
Follow our easy step by step instructions and see how easy it is to make your own upcycled bottle cap frame!
What you will need:
- Plastic bottle tops / caps
- An old picture frame
- Assorted beads (your choice of size & colour)
- String, in various colours
- Drill
- Ruler
- Marker pen
- Paint brush (medium size
- Acrylic paint (colour of your choice)
- Magic Touch (available at most craft stores)
- Working surface
Step 1
To begin this project, gather all of your old plastic bottle tops, wash and leave to dry. It may be useful to sort them into matching colour piles, sorting out the red Coke, green Sprite and blue Fanta caps, etc.

Step 2
Now you want to place your old frame and bottle tops onto your working surface. Arrange the plastic bottle tops inside the frame, in your desired pattern. We have created single lines according to colour.
Add your various coloured beads in between each bottle cap. We have kept the same type and colour bead with the same line of plastic bottle tops. This allows for continuity when your plastic bottle top beading project is complete.


Step 3
With the pattern layed out on the table before you, you can see how many lengths of string you will need running across your frame. Measure the width of your frame and divide by the number of lengths of string necessary, and then mark this out across the width of your board using a pen or marker.
This process allows you to have all lengths of string spaced evenly for the best finished product. We wanted our string to run the longest length of the frame, which means we would have 10 lengths of string to work with.

Step 4
Using your drill, create holes at these marked out spaces. Remember that you need to drill holes on both sides of the frame, so that the lengths of string match up.


Step 5
Now we need to create small holes in each plastic bottle top, on either side of each other. Use your drill and carefully create the holes in all bottle caps for your pattern.
TIP: If you want all of the bottle tops to be with the text the right way round, keep this in mind when making the holes!

Step 6
Now we can start threading the frame!
We have used a different colour string for each length. Thread the string through the hole, placing a bead on the outer side and making a knot to keep the string in place here.

Step 7
With the length of string on the inside of the frame, thread your plastic bottle tops and beads onto the string. Remember that you want to keep the same colour plastic bottle tops and beads together, just as we planned in Step 2.
To give the illusion of floating bottle tops, we have spaced out the bottle tops and beads by using knots. Thread the entire length of string before securing it to the opposite side of the frame.


Step 8
As you thread each strand, secure the end to the opposite side of the frame just as you had started. Thread the string through the hole, place a bead on the outer side of the frame and ensure the string is taut before completion with a knot to hold it securely.


Step 9
With all of your lengths of string completely beaded with the plastic bottle tops and beads, securely in place, you have successfully completed the bulk of this upcycle / recycle project.

Step 10
Should you wish to, you can paint your frame as we have done. Using a small to medium size brush and an acrylic paint colour of your choice, paint the frame completely.


Step 11
To add an extra bit of pizzazz, we used magic touch on the dry coat of paint. Using your finger dipped into the magic touch (silver or gold or whatever colour you like!), gently rub the frame to add highlights to the corners and other areas.


Step 12
All done!
You have created a unique upcycled / recycled wall decoration for your garden or home, made with plastic bottle tops, beads and your own hands!

Step 13
Hang your upcycled bottle cap frame somewhere to decorate your home!


