

Tile Coasters
Step by step instructions showing how to make your own coasters from old tile off-cuts, presented by Crafty Corner
For any questions contact us via email

If you have been renovating your kitchen or bathroom, this is a great craft to use up those bits of leftover tile! Follow our easy step by step instructions and make your own recycled tile coasters.
What you need to make a coaster:
- Tiles, or tile off-cuts
- Tile cutter
- Felt material - colour of your choice
- Tissue paper, or decorative serviettes
- Clear gloss polyurethane varnish
- Newspaper
- Wood glue
- Ruler
- Scissors
- Pencil
- Turpentine
- Medium sized paintbrush
- Container, or mixing bowl
Read through all the instructions first before starting this craft.
Step 1
Place your piece of newspaper on your table top to protect it from getting scratched, and place your tile or pieces of tile on top of it.

Step 2
Use your ruler and pencil to mark off 4 pieces of 9 x 9cm tile.

Step 3
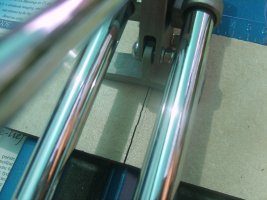
Lift up the metal vice grip on your tile cutter as shown in the pic.

Step 4
Line up the edge of the round blade on your tile cutter so that it is on top of the line along which you wish to cut.

Step 5
Using the handle on your tile cutter move the blade up and down along your cutting line, keep the tile in place by holding it firmly with your other hand. The metal vice grip also helps to keep it in place.

Step 6
Press the handle downward until the tile cracks along the line which you have cut, then lift it up and remove your first piece of 9 x 9 cm tile.
Step 7
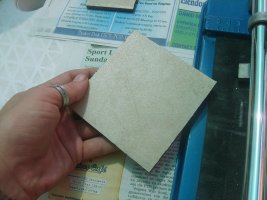
This is what your piece of tile should look like.
Step 8
Use your ruler and pencil to mark off 4 pieces of 12 x 12cm tissue paper.

Step 9
Use your scissors to cut out your four pieces of tissue paper.

Step 10
Use your medium sized paintbrush to mix one tablespoon of wood glue with two tablespoons of water.

Step 11
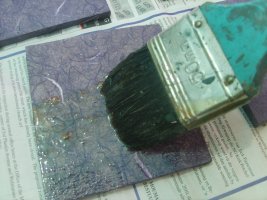
Paint your mixture of water and wood glue onto one of your cut pieces of tissue paper.

Step 12
Paste your tissue paper onto one of your pieces of tile.

Step 13
Make sure there are no cracks or bumps in your tissue paper as you smooth it over the edges of your tile and paste down the edges to cover the sides of your tile.

Step 14
Use your turpentine to clean your brush. You can also use warm water and soap to clean the glue mixture off your paintbrush.

Step 15
Leave your pieces of tile to dry.

Step 16
Once dry, paint over your tiles with a thick layer of clear gloss polyurethane varnish, and leave to dry. You may repeat this step once dry, if you want a more glossy finish on your coasters.
Step 17
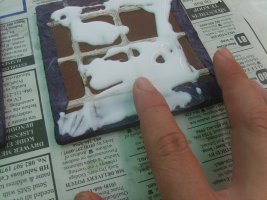
Once dry, cover the bottom of your tiles with wood glue, use your finger to smooth the glue to cover the entire bottom surface.
Step 18
Paste your pieces of tile onto your felt material, and leave it to dry.

Step 19
Cut out the tiles as close to the edge as possible.

Step 20
Your tiles are now coasters, ready for use at home during lunch or dinner, or at work on your desk.