

Upcycled Wooden Birdhouse
Step by step instructions showing you how to make your own birdhouse using recycled wooden planks, presented by Crafty Corner
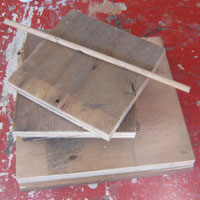
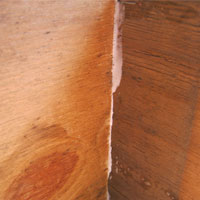
For any questions contact us via emailOld wooden planks, broken cupboards? There is so much wood lying around that can easily be recycled into something. With this upcycling craft we created a beautiful handmade birdhouse from some wooden off-cuts a cabinet maker threw away. Follow our easy step by step instructions and make your own!

What you will need:
- 3x pieces of wood, 150 x 150mm
- 1x piece of wood 150mm x (150mm + X)
- 1x piece of wood 230 x 230mm
- 1x piece of wood 230 x (230mm - X)
- Table saw, or a hand saw
- Wood glue
- Drilling machine
- 8mm wood drill bit
- Sandpaper
- Circle cutter
- Nails
- Hammer
- Dowel stick, 100mm x 8mm (diameter)
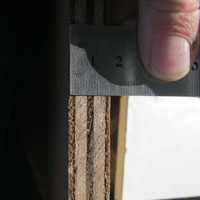
NOTE: X = thickness of the wood you are using
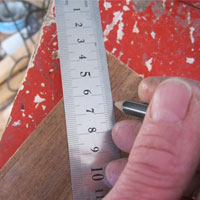
Step 1
Measure the thickness of the wood you are using so that you can work out the value for X.
Step 2
If you haven't done so already, start by cutting your wooden planks to the right size. Start with the 3x pieces that need to be 150 x 150mm square.
Step 3
Now work out the sizing for your next piece of wood with your X added eg: 150mm x (150mm + 16mm) = 166mm, so cut that piece of wood to 150mm x 166mm.
Step 4
We need the two pieces for the roof next, so measure and cut 2x pieces 230mm x 230mm.
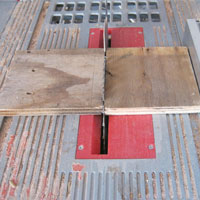
Step 5
From the one 230mm square piece, cut off 16mm on the one side (-X).
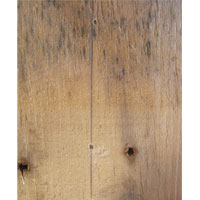
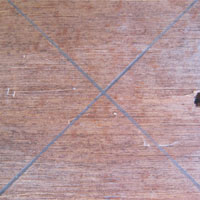
Step 6
Take one of the 150mm square boards, and draw an X on it, from each corner to find the centre point.
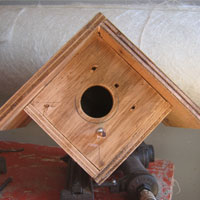
Step 7
At the centre point, use a router or circle cutter to cut a hole large enough for a small bird to fit through.

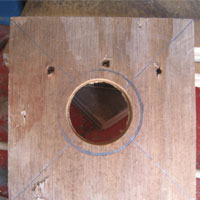
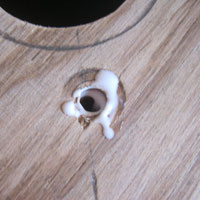
Step 8
A couple of centimetres down from the central hole, use your 8mm drillbit to drill a hole for the dowel stick on one of the diagonal lines.
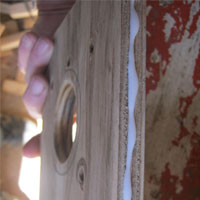
Step 9
Using sandpaper, sand all the edges of the wood removing any stray bits so that you have clean, smooth edges when you assemble and glue.
Step 10
Place the board with the central hole flat on your work surface, and then select the other 150mm square board, and the one piece that is 166mm. These are going to be the floors / sides of your bird house.
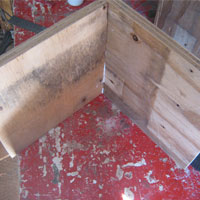
Step 11
Down one edge of your 150mm wooden board place a generous amount of wood glue and align it against the side of the front so that it is standing vertically. Next take the 166mm board and align it so that it is square to the other 2 peaces and nail into place.
Step 12
Turn your work so that the front face is vertical and place the back wall into place. Use a generous amount of wood glue all the time as this will ensure that he finished product is strong and secure.

Step 13
Assemble the roof by placing the two pieces 90 deg to each other and gluing into place. Secure using nails and a hammer.
Step 14
Lie the roof on its side, and assemble the bird house using the boards we prepared in Step 11. Measure to make sure that the 'house' part is in the middle of the roof. The roof should protrude roughly 40mm at both the front and the back of the house.
Step 15
Glue the roof and 'house' parts together. Once dry, see if you can stand it up to give you an idea of how the birdhouse should look like.
Step 16
On the roof of the house measure and draw a line 48mm from the front and back edge, this will becom the nail line, you add a few extra mm so that your nail is in the centre of your wall. Measue from the side to the first wall (50mm) and then mark it on your line on the roof. Remember to add 8mm so that your nail is not off the edge but in the actual wood.
Step 17
Nail the roof into place
Step 18
Make sure your dowel stick is the correct size, and then push it through the hole, working some glue into the hole and around the edges. This will be a perch for birds to stand on.

Step 19
Finish off your birdhouse by sanding it again, and then sealing it off with varnish or wood sealer. Your upcycled wooden birdhouse is now complete!