Wooden Peg Rocking Chair
Step by step instructions showing you how to make your own Wooden Peg Rocking Chair, presented by: Crafty Corner
For any questions contact us via emailThis is a great craft project, finally something to do with all those old and broken clothes pegs you have lying around!

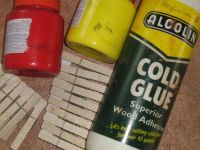
What you need to make a wooden peg rocking chair:
- 16 Whole pegs
- Wood glue
- Coloured craft paint or varnish
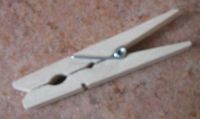
Step 1
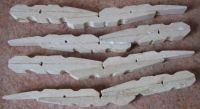
Take the number of pegs you need and have them close at hand.
Step 2
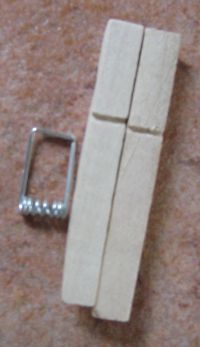
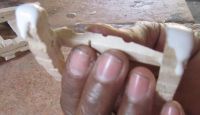
You need to remove the metal spring from the middle. Hold both sides of the pegs and pull all the way sideways and up. You need to do this for all the pegs you are going to use.
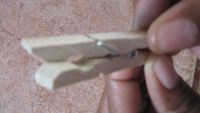
Step 3
You will be left with two halves of the peg and the metal spring. Keep the metal spring to use on later recycling projects.
Step 4
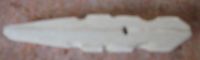
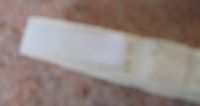
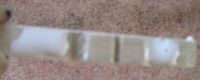
You will now need to glue the two halves of the peg to form a single piece with the flat sides together and the tips in the same direction, making sure that all sides are level (keep 12 half pegs aside for this).
Step 5
Be sure when you glue the two halves together that they are glued with the flat parts together, and with the front of the pegs in the same direction (as in the picture) to make a double.
Step 6
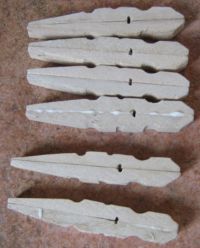
You need to make six of the doubles.
Step 7
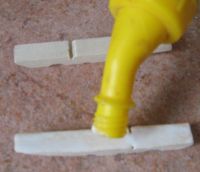
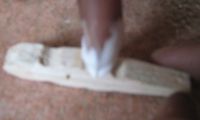
Place a bit of glue on the pointy side of the double peg.
Step 8
The double peg needs to be glued to the flat side of the single. You need to make sure that the tip of the double is glued to where the metal spring was attached (by the little hollow on the flat side of the peg).
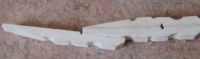
Step 9
Now glue the other side of the flat peg all the way to the tip.
Step 10
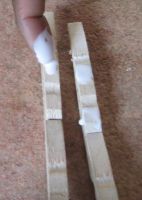
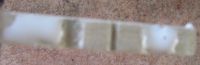
Take another single peg and place it against the glued flat piece with the flat piece against the tip of the other as shown in the picture.
Step 11
You need to follow Steps 7 to 10 again until you have four (4) identical pieces as this will make the frame as well as the rocking piece.
Wait until the glue has dried before continuing, as this will make it easier to handle.
Step 12
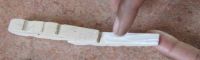
Taking two of the pieces you made in Step 11 and place them side by side. Make sure that the single peg is at the bottom against the surface. The double peg needs to be facing up towards you. Place a bit of glue where the hollows are on the uneven side of the peg for both sides, as seen in the picture.
Step 13
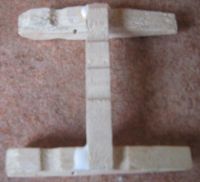
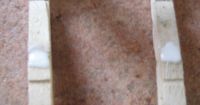
Take the first single peg and place it across the glued piece at the bottom hollow with the flat side against the glue. Make sure that the you align the frame with the single peg as this will give you the actual structure of the frame.
Step 14
Take the second single peg and place it across the glued piece at the top hollow with the flat side against the glue. Make sure that the you align the frame with the single pegs as this will give you the actual structure of the frame for the back of the rocking chair.
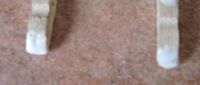
Step 15
Place a bit of glue underneath the top hollow at the pointy side. You need to do this with two of the double pegs you have left.
Step 16
Now place a single peg across both of the double. Make sure that the pointy sides are facing the same way. Ensure that the double pieces are aligned to the edge of the single peg as shown in the picture. Allow glue to dry completely. This now makes the front piece of your rocking chair. The single peg will now be the support for the front piece of the seat.
Step 17
Now you need to use the piece you made in Step 14. Turn the piece over so that the two single glued pegs are against the work surface. Place some glue underneath both the single pieces that are glued to the double piece (the already glued singles will be above where you are gluing).

Step 18
Place a single peg across joining both sides together. You now have made the back piece of your rocking chair. This will also be the support for the seat of the chair for the back.
Step 19
You now need to use the piece you made in Step 16. Place some glue on the botom of the piece (this will be the opposite side of the pointy side).
Step 20
Wait for the glue to dry a little as this will make it easier to stick onto your next piece.
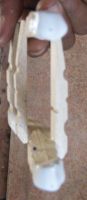
Step 21
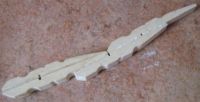
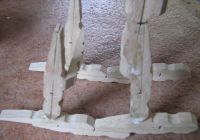
Use the remaining two pieces from Step 11. Place both next to each other with the double piece facing up so that it is leaning on the single piece,make sure the pointy sides are in the same direction. Place the glued piece on the little cut between the hollows. Make sure that the already glued single peg is facing towards the back, away from the pointy sides as shown in the picture. These are now your arm supports for the rocking chair.
Step 22
Place some glue on the ends of the back piece at the bottowm. The supports will be at the top. Allow to dry slightly.
Step 23
At the same time as Step 22 put some glue in the first hollow at the back of the piece you made in Step 21 (this will be on the double piece). Allow the glue to dry slightly.
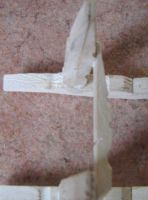
Step 24
Once the glue has dried slightly place the back piece onto the glued area. Make sure it is placed correctly so that the single glued peg support is facing the already glued arm supports.
Step 25
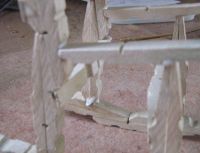
Use two single pegs and place some glue on the ends of the back (this is the opposite side of the pointy side) as well as in the first hollow closest to the pointy side. Allow to dry slightly.
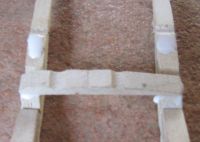
Step 26
Place the the peg onto the first arm support. The hollow with the glue needs to be on the arm support. The back needs to be placed onto the hollow of the back support above the seat support as shown in the picture.
Step 27
Place the the peg onto the first arm support. The hollow with the glue needs to be on the arm support. The back needs to be placed onto the hollow of the back support above the seat support as shown in the picture.
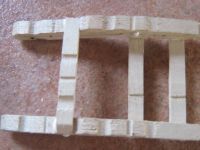
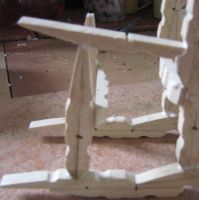
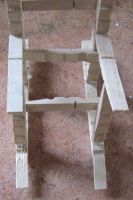
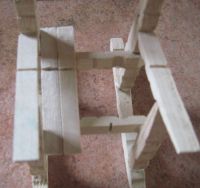
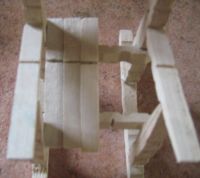
Step 28
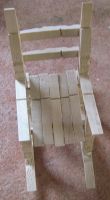
This is the complete frame for your rocking chair. All that remains is to put the seat on.
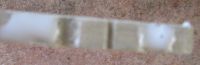
Step 29
Using a single peg put some glue onto the pointy side, before the hollow, as well in the back hollow.
Step 30
Place the single peg onto the the frame. The hollow with the glue needs to be placed on the back support with the pointy side on the front support.

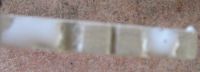
Step 31
Now, using a single peg put some glue onto the pointy side, before the hollow, as well in the back hollow.

Step 32
Place the single peg onto the the frame the hollow with the glue needs to be placed on the back support with the pointy side on the front support.
Step 33
Using a single peg, put some glue onto the pointy side, before the hollow, as well in the back hollow
Step 34
Place the single peg onto the the frame the hollow with the glue needs to be placed on the back support with the pointy side on the front support.
Step 35
Now, using a single peg put some glue onto the pointy side, before the hollow, as well in the back hollow.
Step 36
Place the single peg onto the the frame the hollow with the glue needs to be placed on the back support with the pointy side on the front support.

Step 37
Using a single peg, put some glue onto the pointy side before the hollow as well in the back hollow.
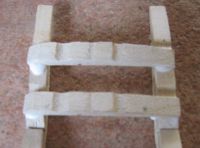
Step 38
Place the single peg onto the the frame the hollow with the glue needs to be placed on the back support with the pointy side on the front support. This will now complete the seat as well as your rocking chair.
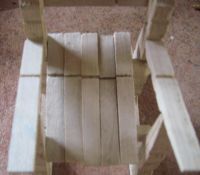
Your rocking chair is now complete. Allow the glue to dry completely before you either varnish or paint your chair.