
Step by step on how to make a two piece moulded candle as presented by: Crafty Corner
Suitable for young adults and older. For any question contact us via email
general warning, wax is hot, so take extra caution when working with young people.
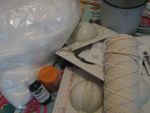
What you need to make a two piece moulded candle:
- You will need a stove
- Pot to melt the wax
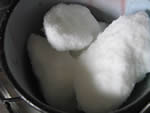
- 500 gm DCW Wax
- Wick
- 2 piece mould
- Thermometer
- Masking Tape
- Wax coloring (optional)
- Fragrance (optional)
Step 1
Choose a pot with handles that are easy to hold and that don’t get hot. For smaller candles large tins and enamel mugs are handy.
Step 2
Put 500 grams of dcw wax into the pot and melt. Watch the wax at all times. When it is melted it becomes liquid and is ready to pour. Don’t leave it on the stove top beyond this point without turning the stove off. Do not let the wax go over 120 deg c; turn off and remove from stove till it cools to 85 – 95 deg c.
Step 3
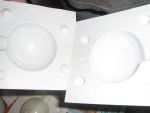
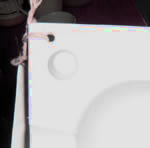
While you are waiting for your wax to melt you can prepare your mold. If you have a new mould start off by making a hole in one of the the top corners of each piece of the mould and tying a string thought the holes so that it keeps the two halves together. We do this to make sure that we can always find the two halves that match perfectly together when we want to use this shape again.
Step 4
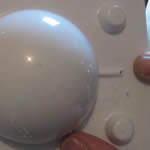
Make a hole in the bottom of the mould so that you can pull your wick through, this way you can make sure the wick is secure and wont pull out half way through making your candle
Step 5
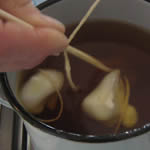
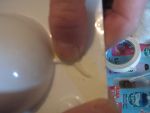
Prime a length of wick by dipping it into the hot wax, pulling the wick though two skewer sticks to squeeze off the excess wax and ensure that the wax is pressed into the fibres
Step 6
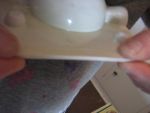
Tie one end of the wick to a short piece of skewer stick and thread the other through the hole at the bottom of the mould. Pulling if firmly then anchor and seal the hole with a short piece of masking tape. This will now keep the wick firmly in place while you pour the wax as well as help to keep it in the center.
Step 7
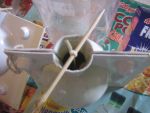
Now seal up the edges of the mould with your masking tape. This we found to be the cheapest and most convenient method of sealing these types of moulds.
Step 8
Checking to make sure that your wax is between 82 – 85 deg C ; you can now fill your mould till the level of the wax is just touching the filler neck on the inside of the mold. Note on the square moulds you must tip it to all sides to ensure that you get rid of air bubbles that may be trapped in the corner, you can also gently tap the mould to help.
Step 9
Check your wick and make sure that it is still in the center of the mould. Place to one side and let it cool.
Step 10
When it is cold you can now take, preferably a metal skewer stick or screwdriver, and in the sunken in area poke with the skewer along the wick. This is to check for air pockets that may have formed. Do not worry as this is very normal; you now need to make a hole big enough to allow you to top up the candle and fill the hole. You may need to do this once or twice more till the candle totally full.
Step 11
Allow to cool over night before you try to take the candle out of the mould.
Step 12
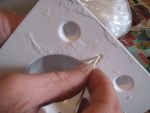
Remove all the tape first then gently slide your finger between the two halves releasing the candle.
Step 13
Take your final candle trim off the filler edge so that it stands flat on a surface, clean off the joining edge with a sharp knife. If you do not plan on doing anything further to your candle, trim the wick to about 5mm from top of the candle.
