

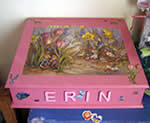
Decoupage Lap Desk
Step by step on how to make a Wooden Lap Desk as presented by: Crafty Corner
For any question contact us via email
Stunning little portable desk for anyone that likes to sit outside under a tree or in a different room from time to time and do there letter writing or homework
This decoupage project is going to take a while as there are lots of stages where you going to need to wait for bits to dry.
What you need to make a Wooden lap desk:
- Wooden Lap desk
- Paper with pictures to cut out
- Crafts Knife
- Scissors
- Acrylic paint
- Modge podge
- Hard Varnish
- Water Sandpaper
- Roller
- Brushes
- Wooden Letters For the name
- Sponge applicator
Step 1
The first thing you going to be doing is sanding the lap desk. Use a 1200 water paper. Use a very fine water paper as the box will not be very rough to start with. We just giving it a light sand to get rid of oil marks and maybe remove the sticky patch where the price might be.
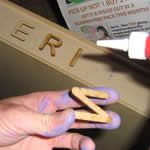
Step 2
With wood glue we are going to stick our letters on the front of the lap desk. We need to space the letters out carefully and make sure they all fit on. You can use a ruler and pencil and you can even write on the wood at this stage as it will all be covered later with paint .Leave the letters to dry for at least 6 hours, overnight would be better.
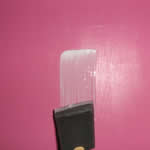
Step 3
With your base color of acrylic paint you going to paint your entire lap desk. Make sure you paint a thin layer. Inside and out. Follow the basic painting techniques for decoupage when doing this step. Leave it to dry, acrylic paint usually take about 20 min to be touch dry but id recommend waiting at least two hours between coats.

Step 4
You can in the mean time start cutting out your images and getting them ready for your project. Your pictures need to be cut out exactly. Use a craft knife to get to the small hard to reach places. No background color must be showing as this takes away from the overall appeal of decoupage. There are some picture techniques on the basic decoupage page.

Step 5
Paint a second layer of your acrylic paint onto your lap desk, inside and out. Make sure you paint in the opposite direction to your last layer. Leave to dry for at least 6 hours.
Step 6
With fine water paper, at least 1200 you are going to sand your lap desk down. Make sure you wet your paper. You need to only gently rub your desk, dont try sand the color off, we trying to obtain a smooth flat finish. If you sand to much you might sand through to the wood. Leave it to dry and then wipe it down with a damp cloth. Refer to sanding techniques

Step 7
Paint a third layer of your acrylic base color onto your desk.
Step 8
Paint one thin layer of Modge Podge onto your desk, when applying modge podge work in the opposite direction to your paint strokes. The modge podge take about 20 to 30 minutes to dry if you painted it on thin. Dont work with modge podge in direct sunlight or try speed up the drying process. Leave it to dry naturally.
Step 9
Chose your pictures and plan where you going to place them. Start with a few little ones inside the lid and sides of the desk so you can get some practice on how to work with modge podge and pictures. Place a blob of modge podge onto the spot where your picture is going to go and smooth it out. You want quite a generous layer of modge podge as you do not want it to dry out before you get chance to place you picture and get it well stuck. Place you picture down and with a wet modge podge finger rub your picture so that it is flat and there are no bubbles under the picture.

Step 10
Smooth over the picture and remove the excess modge podge with your sponge applicator. Leave to dry
Step 11
Place a liberal amount of modge podge onto the top of the desk where your big picture is going to go. You need to work quickly if you doing a big picture. The safest and easiest way is to make sure you have enough modge podge and that the picture does not start drying out. Rather a bit too much than too little. You can always wipe off the excess modge podge later. Place your picture onto the surface and use a rubber roller with lots of modge podge to flatten your picture onto the desk. If you get air bubbles this means you dont have enough modge podge behind your picture. You will not be able to remove the picture at this point so the best thing to do is make a tiny pin prick in the bubble to help the air escape. Wipe of all excess modge podge with a damp cloth.
Step 12
Apply all your pictures in the same way and finish the entire lot with one layer of modge podge.
Step 13
We now need to apply at least ten layers of modge podge over the entire box, each layer must be applied in the opposite direction and left to dry till it is touch dry between coats. Leave the lap desk to dry overnight after the tenth coat.
Step 14
Sand the entire decoupage lap desk again with a 1200 grit sand paper and a little bit of water. Dont rub to hard.
Step 15
Paint another 10 layers of modge podge, Sand. repeat this till you cannot feel the picture when you run your finger over it.
Step 16
Once you have completed all the modge podge layers you can finish off your project with three layers of hard varnish. Leave the varnish to dry for 24 hours before you use your desk.
