

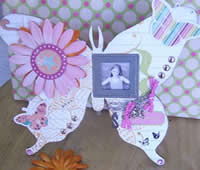
Spring day Butterfly Frame
Step by step on how to make a butterfly frame, presented by Shoestring Scrapbooking

For any questions contact: Canica
What you need to make a butterfly frame:
- Wooden butterfly blank
- Sheet of patterned paper, 12 X 12cm
- Small metal photo frame
- Small photo
- Double sided tape
- Craft knife
- Wood glue
- To decorate – flowers, 2 paper butterflies, brads or buttons, rhinestones and chipboard swirl
Read through all the instructions first before starting this craft.

Step 1
Cover the edges of the wooden butterfly with double sided tape.
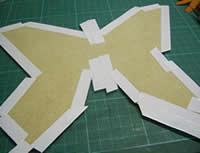
Step 2
Stick onto paper and cut out using a craft knife.

Step 3
Use chain on bottom right wing and add some ribbon and charms here and there.

Step 4
Stick a large flower on to the top left wing & your frame with the photo towards the centre.

Step 5
Use paper butterflies, brads & rhinestone to decorate your butterfly.

Step 6
Once you are finished decorating your butterfly use wood glue to stick your wooden stick on the back centre and leave to dry.

Step 7
Your butterfly picture frame is now complete and ready to be used in a spring day scrapbooking project!