

Dad Fathers Day Card Stand
Step by step on how to make a Fathers day card stand, presented by Shoestring Scrapbooking

For any questions contact: Canica
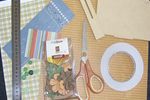
What you need to make a Fathers day card stand:
DAD card stand kit
The Father's Day DAD card stand kit can be purchased directly from Shoesstring Scrapbooking. The kit includes:
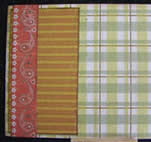
- 2 x Patterned 12 inch X 12 inch papers
- 1 X Paper border
- 2 x Small metal frame
- DAD lettering
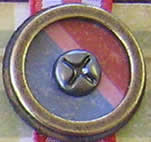
- 2 X Metal flowers
- 2 X Washers
- Ribbon
- 1 X Wooden Card Stand
You will need the following scrapbooking tools:
- Double sided tape
- Craft knife
- Cutting mat
- Scissors
The Dad Card Stand Kit is a fantastic way to create something handmade to give to your Dad on Fathers Day. Because it is handmade, you can exercise your own creativity, which will show Dad just how much you care. In this step by step we will show you how to create a beautiful gift for your father using basic scrapbooking techniques.
Covering The Card Stand
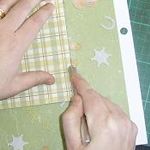
Step 1
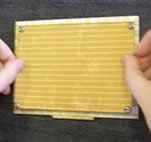
We are going to start by covering the wooden card stand. Remember to do one side at a time. Stick double sided tape around the border of the wooden card stand and then stick it down onto your paper.

Step 2
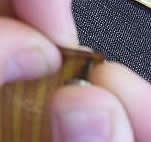
Now we are going to cut it out – so cut along the edges with the craft knife, like you are tracing it.
Tip: If the edges are a bit rough after cutting it out, then sand the edges lightly – this will smoothen the edges.
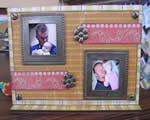
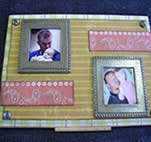
Embellish and Decorate Wooden Card Stand – Side 1
Step 3
Now take the other 12 inch X 12 inch patterned paper and cut a piece measuring 16cm X 10cm. Once you have cut out this block you can put a brad in each corner. (A brad is like a split pin, push it through the paper and flatten at the back.)
Step 4
Once you have put the brads through each corner you are then going to stick this block in the middle of the card.
Step 5
Now stick down your 2 metal frames.

Step 6
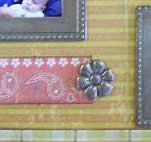
Now cut your paper border in half, and then the half in half again. I stuck the 1 border on the left side underneath the frame, and on the right side above the frame.
Then stick a metal flower on each end of the borders.
Optional – you can stick words in the borders like love or joy etc.
THAT IS SIDE 1 DONE
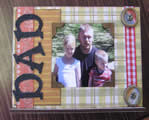
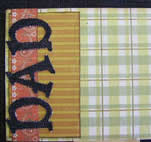
Embellish and Decorate Wooden Card Stand – Side 2
Step 7
Now cut out another block measuring 6cm x 10.5cm and stick your other half of the border on top of this block - then stick it down to the card stand on the left side.
Step 8
Then use lettering and stick down the word DAD on the left side.
Step 9
Now stick your 10X15cm photo in the centre and stick a piece of ribbon on the right side. I used metal photo corners on my photo, but you can make your own photo corners or use brads.
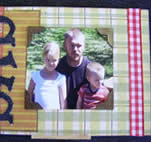
Step 10
I then used 2 metal washers on the top and bottom of the ribbon to decorate. Use a medium circle punch and punch out two circles. Then glue your washers in the centre of the circles and let it dry. (so you are going to have a thin paper border on the outside of the metal washer). Then push through brads in the middle of the circle and stick down to the top and bottom of ribbon.
Step 11
Slot your picture into the frame base
YOU ARE DONE!!!
