Changing a plug
Step by step instructions showing you how to change your own plug, presented by Crafty Corner
For any questions contact us via email
Lees in Afrikaans
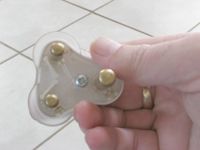
What you need:
- 3 pin plug
- Phillips (star) screw driver
- flat head screw driver
- Pair of wire strippers
Notes:
The best plugs to get are usually the ones that are fastened by a screw. You can also get the clip on plugs but the clips dont usually last and tend to break if you are not careful with opening or closing the plug up. The picture here is an example of the best plug to use.
Step 1
To start connecting your plug, first loosen the screw in the centre of the plug that holds it together by using your Phillips (star) screw driver.

Step 2
Remove the screw and put it in a safe place so that you will not lose it. Open up the plug and put the cover to one side.

Step 3
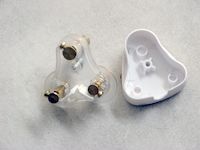
You will now see that your plug has got 3 pins. A long pin at the top and 2 short ones at the bottom of the plug. Each pin has got a screw in the side of it which covers up a hole in each pin. These holes are where you would now connect your wiring to.
Step 4
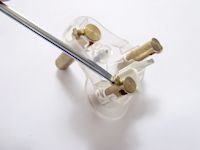
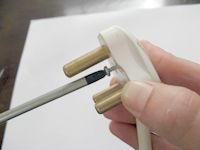
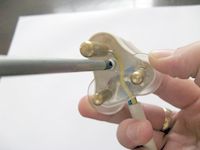
Now take your flat head screw driver and unscrew the screws that are in each pin. Be careful not to unscrew the screws completely, just unscrew them enough so that you are now able to see clearly through the hole in each pin.
Step 5
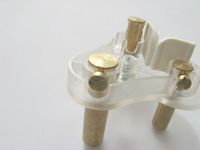
Look for the 2 plastic sleeves at the bottom center of the plug. Remove the sleeves. This will make it easier for you when you need to start connecting your wiring to the pins.
Step 6
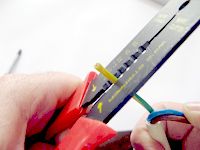
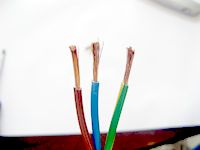
Use the wire strippers to strip away 1cm of the plastic of the 3 wires to expose the copper cabling within.
Step 7
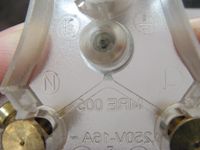
Now, before you even consider connecting the wiring to the pins, there are a couple of things to always remember. When looking at your plug, you will see that for the 2 short pins there are markings on the plug which tell you which wires must be connected to which pin. If you connect your wiring to the wrong pins and you put your plug into the wall socket then things can go horribly wrong. If you lucky it could just trip your mains but more seriously it could give you an electrical shock or even cause a fire which is not a good thing at all. If you have a look at the 3 wires you are going to connect, the general rule is that they are 3 different colors, Blue, Brown and Green with a yellow stripe in it or sometimes just plain green. These 3 colored wires are very important to your connecting of the plug. On the plug, the 3 markings you will see is as follows; where the Central long pin is situated, there is an E imprinted, at the left bottom side of the small pin there is a N imprinted, and at the right small pin there is a L imprinted. These 3 letters stand for EARTH, NEUTRAL and LIVE.


Step 8
The green and yellow striped wire is connected to the long pin in the Central top of the plug. This will earth the plug and prevent any electrical shocks. Take your yellow wire and insert it into the hole of the pin marked with an E then fasten the screw which will tighten against the wire and keep it in the pin.
Step 9
The blue wire is connected to the left pin which is your neutral, which, helps the electric current run through the appliance back to the source of power where it came from otherwise your electrical current will only end at the plug and not reach through to the appliance that is connected to the plug. Take your Blue wire and insert it into the hole of the pin marked with an N then fasten as per above.

Step 10
The brown wire is connected to the right pin which is your live, this is the wire which actually carries the electricity through to your appliance that your plug is connected to.
Take your Brown wire and insert it into the hole of the pin marked with an L then fasten as per above.
NOTE:So in future always remember the following; green is earth, blue is neutral and brown is live.

Step 11
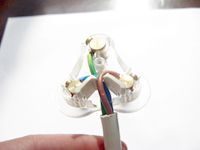
After doing this, you can now put the 2 plastic sleeves back into position. This will now keep the wires securely in place and prevent them from being pulled out of the pins by accident.
Step 12
You can now put the plug cover back on to the plug and screw the star screw back on in order to close up the plug.
Step 13
Once you have done this, you can now go ahead and plug it into the wall socket and your appliance will work.


