

Matchbox Drawers
Let your children make their own chest of drawers with this fun craft project! Follow our easy step by step instructions to make your own matchbox drawers.
Step by step instructions showing how to make your own matchbox drawers, presented by Crafty Corner
For any questions contact us via email
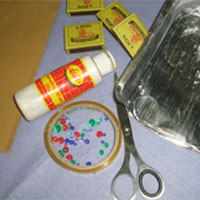
What you need to make matchbox drawers:
- 4 matchboxes
- 4 small beads
- 4 medium-sized beads
- Contruction glue
- Recycled tin container
- Scissors
- Felt
- Embossing tool
- Sellotape
- Cardboard
- 4 jeweller's pins
Read through all the instructions first before starting this craft. Make sure you have everyting you will need at hand and your working area is clean and tidy. Cover your surface with plastic or brown paper if you need to.
Step 1
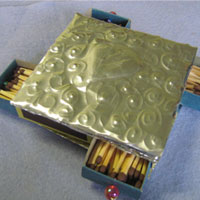
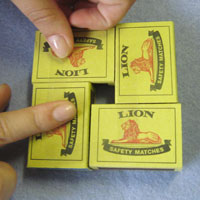
Use sellotape to stick the four matchboxes together, as shown in the picture. Stick them together on both sides for extra strength.
Step 2
Cut two pieces of cardboard, a piece of the tin and a piece of felt the same size as the taped-together matchboxes.
Step 3
Glue the cardboard to either side of the matchboxes and then leave to dry.
Step 4
Once the cardboard is firmly stuck to the matchboxes, place the square of felt on the top. Leave to dry.
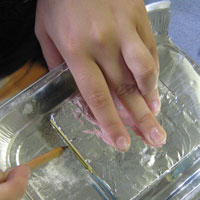
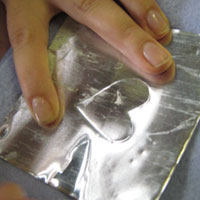
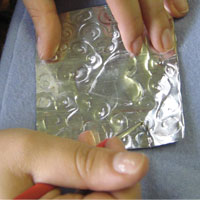
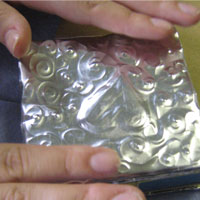
Step 5
While you are waiting for the felt to dry, you can begin engraving or embossing patterns into your square of tin. You can use an embossing tool, or something like the back of a thin painbrush to emboss.
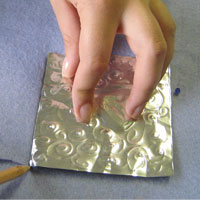
Step 6
Glue your embossed tin onto the felt.
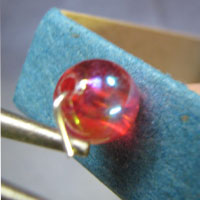
Step 7
Take a small bead and push it to the end of your jewellers pin.
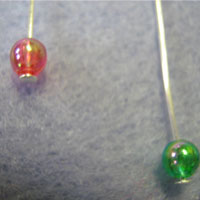
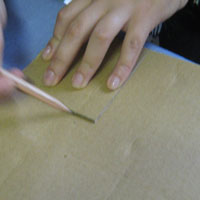
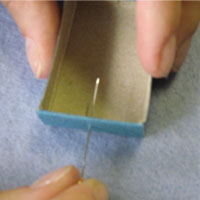
Step 8
Poke a hole in the centre of the part of your matchbox that will slide out, and insert the jewellers pin into the hole.
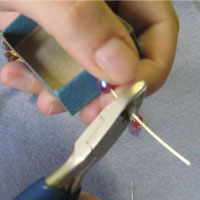
Step 9
Push a larger bead along the pin, cut the pin to about a centimetre away from the bead, and fold the pin over to secure it and prevent the bead falling off.
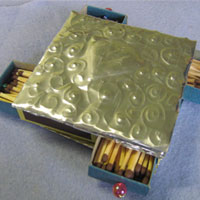
Step 10
Repeat Steps 7, 8 and 9 on your remaining matchboxes. You matchbox drawers now have handles.
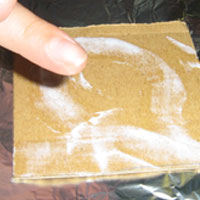
NOTE: When you run out of matchsticks, simply refill with matches from a new matchbox.
TIP: When embossing patterns into your tin, it is advised to press on something soft to avoid making holes.