

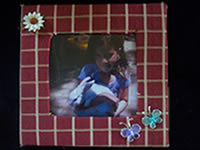
Recycled Fabric Picture Frame
Let your children make their own picture frame for granny, Mother's Day, Fathers Day or as a Christmas gift, and they get to put their favourite picture of themselves in it. This is a great craft project for kids of all ages. Follow our easy step by step instructions to learn how to make your own!
Step by step instructions showing how to make your own recycled fabric decorated picture frame, presented by Crafty Corner
For any questions contact us via email
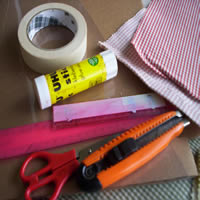
What you will need:
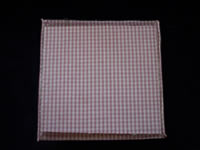
- Three pieces of scrap fabric approximately 15cm x 15cm in size
- 1 piece of A4 size card board
- Acetate sheet (12cm x 12cm sq)
- Clear glue or Modge Podge for little kids
- Scissors
- Craft knife
- Photo
- Ruler
- Marking pen
- Scrapbooking butterfly or flowers
Read through all the instructions first before starting this kids craft. Make sure you have everything you need on hand and that your working area is clean and tidy. Cover your surface with plastic or brown paper.
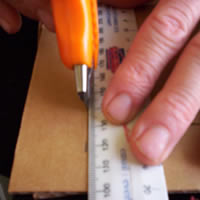
Step 1
Cut out one square of 13cm x 13cm using a craft knife.
Cut out another square of 12cm x 12cm.
Measure a square inside the 13cm x 13cm board, 3cm from all sides.
Cut out the inside square.
Step 2
Cut out one more piece of board 5cm x 10 cm. This is the flap to hold the picture up. Fold this piece on the 3cm mark. Cut the 7cm part at a slight angle.

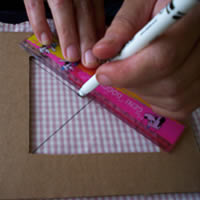
Step 3
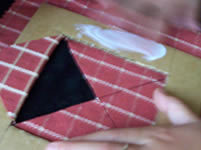
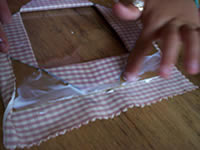
Place your cut out 13cm x 13cm square onto the fabric, making sure there is enough to cover all around the square. Place a ruler diagonally from one corner to the other corner at a 45 degree angle and mark the fabric right up into the corner.
Do this from the other two corners as well so you are left with a X marked on the fabric.
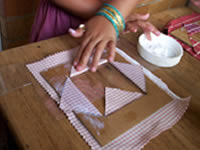
Step 4
Fold your fabric in half along the one marked line. Snip along the other line to make a place for the scissors to fit into.
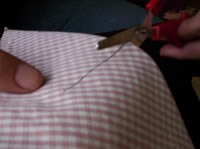
Step 5
Cut along all these lines right up to the end of the lines.
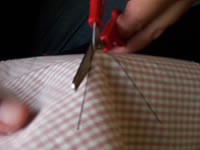
Step 6
Place the picture frame onto the wrong side of the fabric and make sure your corners are cut out correctly.
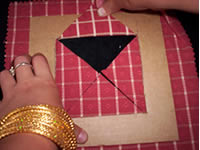
Step 7
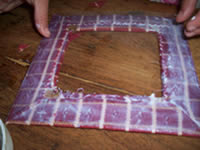
Glue or Modge Podge the picture frame and fold the fabric from the center over the frame onto the glue.
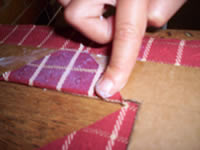
Step 8
Make sure you pull the fabric nice and tight and that the corners are glued well.
Step 9
Rub Modge Podge over the fabric to help keep it in place in the corners. This also helps the fabric not to unravel in the corners.
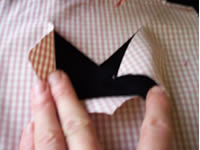
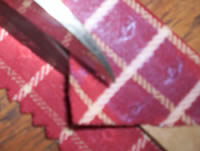
Step 10
Cut the extra fabric off of the triangle that is overlapping the picture frame.
Step 11
Put glue on the frame right up into the corners and over the fabric that is already stuck down and fold the outer fabric onto the frame.
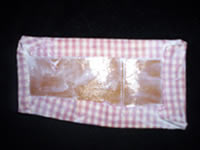
Step 12
Glue all over the top of the frame that is now covered with fabric and place you acetate in the middle and leave it to dry.
Step 13
Glue the fabric onto the back of the second square and fold it over to the inside. Glue your picture to the inside.
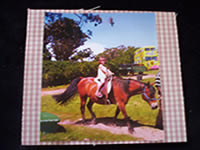
Step 14
Glue around the picture on the inside. Turn it around and glue it to the picture frame.
Step 15
Cut out a piece of fabric to cover the flap for holding the picture up.
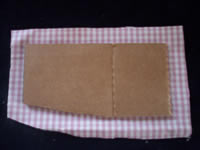
Step 16
Cut out another piece of fabric to fit exactly on top on the right side of your flap to hide the folds away.
Step 17
Glue the flap on the 3cm x 5cm rectangular piece and leave the rest as your flap. Make sure the bottom is the piece that is cut at an angle.

Step 18
Glue some butterflies or flowers around the outside on the front of your picture frame. Wrap it up and see that smile from granny!!
