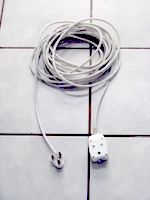
Extension cable
Less in AfrikaansStep by step instructions showing how to make a 10m extension cable, presented by Crafty Corner
For any questions contact us via email
What you need to make a 10m extension cable:
- 10 metre 3 tier electrical cable
- 3 pin plug
- Double or single sided 3 pin adapter
- Phillips (star) screw driver
- Flat head screw driver
- Wire stripping tool
- Carpenter knife if you do not have a wire stripper
Notes:
All these things are available at your local hardware store.When buying your cable, ensure that is has the 3 wires encased inside it and check with your hardware store that you are buying the correct thickness of cabling that you need.
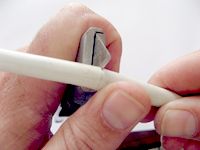
Step 1
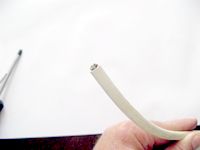
To connect the 3 pin plug, you will first need to remove about 2cm of the wire casing using a carpenter knife. Now when you do this, do not press too hard with the blade else you will end up cutting the plastic wire casings inside the cable and thus you will need to strip off more of the cable casing again. Move your blade gently around the cable casing until you see that you have made a clean cut. Bend the outer casing to expose the wiring inside and gently, pulling the casing of the wiring to expose the 3 coloured wires inside.

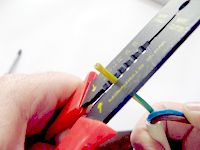
Step 2
Now use you wire stripper to remove about 1cm of the plastic covering of each wire to expose the wiring inside.
Note:You need to follow this procedure on both ends of your new extension cable.
Step 3
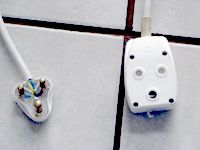
You can now connect you 3 pin plug to the one end of your extension cable. Read How to connect a 3 pin plug. On the other end of your extension cable, you will now connect your 3 pin inlet adapter. For this exercise I have used a double sided adapter.
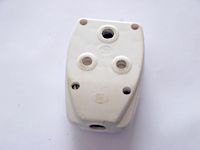
Step 4
The adapter has usually got 4 small flat head screws that keep it closed. Loosen these 4 screws using you flat head screw driver, take the cover of being careful not to turn the cover upside down so that you do not lose the screws but keep them in place in the holes and put the cover to one side. You will now see the inside of the adapter.
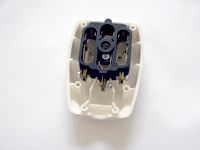

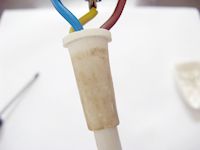
Step 5
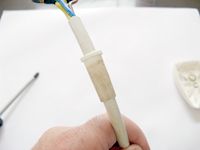
You will also have a rubber piece that is called a protector. Slip this over the end of your extension cable. Later when you put the whole adapter together again, this rubber protector will be moved up into the casing to protect the opening where the wires are in and the make sure that the wiring will not easily be pulled loose.
Step 6
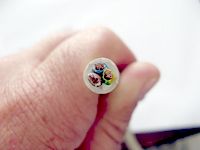
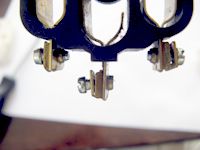
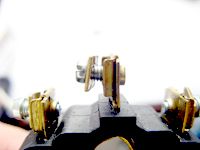
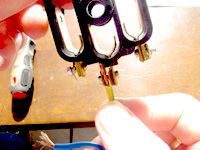
Take a good look at the wiring connection points on the inside of the adapter. The black connection part is removable. Take it out of the shell and look at it carefully. You will see that there are 3 connection points here where you will need to connect the wiring. Look at this carefully and you will see the each connection has a screw which you can loosen. Loosen the screws, but do not remove them. After loosening the screws, you will see that there is a small plate which now hangs loose
Step 7
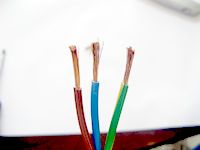
To connect the wires to this is quite simple. You will always connect your GREEN wire or GREEN YELLOW striped wire to the centre connection. This is your EARTH.
Step 8
Put the wire in between the little loose plate and the fixed plate, twist the wire around the screw and then fasten the screw to keep the wire in place. Now, you can connect your BLUE and BROWN wire to either side of the connection. At this stage it does not matter on which side you connect the blue wire or the brown wire.


Step 9
Once you have connected the wires, you can now place the electrical adapter back into its cover, but, before doing this, you now have to place it in the correct way. On the inside of your cover, you will see 3 markings. The centre marking is E for EARTH. This one you do not need to worry about as you centre wire that you connected to the electrical point is your EARTH wire. However, when putting the electrical point into the covering, you need to check the markings on the left and right of the adapter cover on the inside. The left side will have a N for Neutral and the RIGHT side will have a L for LIVE. Make sure that BLUE wire is on the LEFT and the BROWN wire is on the RIGHT.
Always remember the following:- L, Live, Brown Wire
- N, Neutral, Blue Wire
- E, Earth, Green or Green with Yellow stripe Wire
NB: If you mix these up then your appliance will not work and can cause a short circuit and blow an appliance or cause a fire.

Step 10
Now place the electrical connector correctly into the casing and move the rubber protector into place.
Step 11
Place the other cover back on and fasten the screws. Your 10 meter extension cable is now complete.