
Step-by-step on how to make Orange & Clove Pomanders, presented by: Crafty Corner
A fun, sweet-smelling fruit craft for children
This is a wonderfully simple and sensory craft that children love. Using an orange and whole cloves, you’ll create a traditional pomander — a natural air freshener that smells warm, spicy, and comforting.
As the cloves are pushed into the orange, the scent slowly releases, filling bedrooms, cupboards, or small spaces with a fresh, festive fragrance. Many children like to imagine their pomander as a little spiky hedgehog, which makes the process even more fun.
This is a gentle, hands-on activity that encourages focus, fine motor skills, and creativity, with a very satisfying result.
Presented by: Crafty Corner
Skill level: Beginner
Age suitability: 5+ with adult supervision
Supervision note: Uses toothpicks and cloves; gentle supervision recommended for younger children
Materials and tools
- 1 orange
- 2 pins
- Toothpicks
- Ribbon
- Whole cloves
- Scissors
- Thimble (optional, but helpful)
Before starting, prepare a clean workspace. Cover the table with plastic or brown paper to make cleaning up easy.
Step-by-step instructions
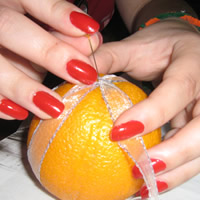
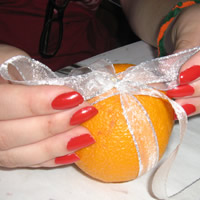
Step 1: Tie the ribbon
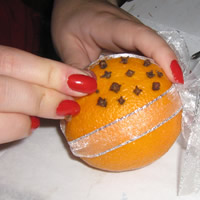
Wrap the ribbon around the orange as if you are tying a parcel. Cross it over the top and bottom so that the orange is divided into four sections.
At the top of the orange, tie two neat bows. These bows will later be used to hang your pomander.
Take a moment to adjust the ribbon so it sits snugly but not too tight.
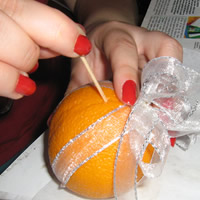
Step 2: Make small holes
Using a toothpick, gently poke small holes into the skin of the orange. These holes will be where the cloves go.
An adult can help younger children with this step if needed.
Step 3: Add the cloves
Push a whole clove into each hole you have made. Press it in firmly so it stays in place.
This is where the lovely smell really starts to come out.
Step 4: Keep going
Continue making holes with the toothpick and filling them with cloves. Work slowly and cover as much of the orange as you like.
Some children prefer lots of cloves close together, while others like spacing them out — both work just fine.
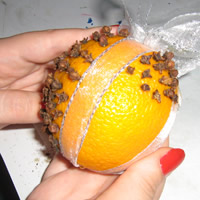
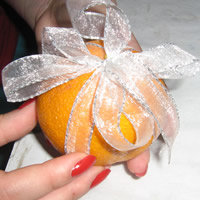
Step 5: Hang your pomander
Once your orange is covered in cloves, your pomander is complete.
Use the ribbon loops at the top to hang it from:
- A cupboard handle
- A hook or nail on the wall
- A coat hanger
- Or even a Christmas tree
It will slowly dry out and continue to smell wonderful over time.

Helpful tips
Pomanders make lovely handmade gifts and are great for teaching children about natural scents.
If the holes close up before you insert the cloves, simply poke them again with the toothpick.
If pushing in the cloves starts to hurt little fingers, use a sewing thimble to protect the skin.