
A simple paper craft that surprises when you open it
Pop-up cards are always exciting — there’s something magical about opening a card and seeing a picture stand up inside. This project is a fun introduction to paper engineering for children and is perfect for birthdays, thank-you cards, or just sending a happy message to someone special.
Children can design their own flowers, colours, and decorations, making every card completely unique. The steps are simple, and the results feel impressive, especially for first-time card makers.
Presented by: Crafty Corner
Skill level: Beginner
Age suitability: 5+ with adult supervision
Supervision note: Uses scissors and glue; light supervision recommended for younger children
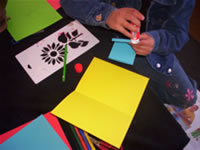
Materials and tools
- Coloured thin card (A4 size)
- Coloured paper
- Scissors
- Glue
- Felt-tipped pens or crayons
Before starting, read through all the steps together. Make sure you have a clear workspace so folding and gluing are easy.
Step-by-step instructions
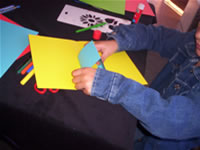
Step 1: Make the card base
Start by folding an A4 sheet of thin card in half. This will be the outside of your card.
From another piece of thin card, cut out a 10 cm × 10 cm square. You can use a different colour if you like — bright colours make the pop-up stand out.
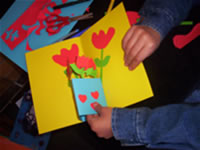
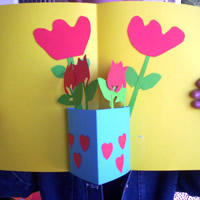
Step 2: Create the pop-up vase
Fold a small lip along the edges of your square card. These folded edges will help the shape stand up.
Glue this square inside the folded card to form a vase. Make sure it is placed neatly and straight so it opens and closes smoothly.
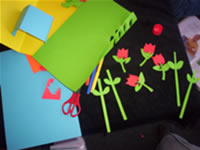
Step 3: Make the flowers
Cut out flowers using coloured paper. Use green paper for stalks and leaves, and any colours you like for the flower heads.
You can:
- Draw flowers freehand
- Use stencils
- Mix different shapes like roses, tulips, or daisies
There’s no right or wrong — imagination is encouraged.
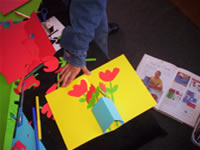
Step 4: Glue the flowers inside
Glue the flowers inside the vase. Take your time and place them carefully so they sit neatly inside.
Make sure the flowers are positioned so they are hidden when the card is closed and pop up nicely when opened.
Step 5: Decorate the card
Now decorate the rest of your card. Cut out small shapes such as hearts, diamonds, or extra flowers and glue them onto the front or inside of the card.
You can also add drawings, patterns, or borders using pens or crayons.
Step 6: Add your message
Your pop-up card is now complete.
Write a message to a friend or someone you love. Open and close the card a few times to enjoy the pop-up effect.
Helpful tip
If this is your first time making a pop-up card, practise folding and gluing on a scrap piece of paper first. This helps build confidence before making the final card.