
Apple Stamp Valentine’s Day Cards
A fun printmaking and card-making project for older children
This is a fantastic Valentine’s Day craft for older kids who enjoy getting a little creative — and a little messy. Not only do children get to design and decorate their own Valentine’s cards, they also get to make a custom stamp using an apple, which is always a highlight.
This project combines cutting, painting, stamping, and writing, making it engaging from start to finish. With adult help during the cutting stage, children can proudly create a one-of-a-kind card that’s perfect for gifting.
Presented by: Crafty Corner
Skill level: Beginner
Age suitability: 8+ with adult supervision
Supervision note: Uses a knife to cut the apple; an adult must assist with carving the stamp
Materials and tools
- 1 piece of black cardboard paper
- 1 piece of light pink paper
- 1 piece of dark pink paper
- Scissors
- Jewel glue
- 1 apple
- Knife (adult use only)
- Pink paint
- White paint
- Paintbrush
- Glitter
- Permanent marker
- Pencil
- Ruler
Before starting, prepare a clean and tidy workspace. Cover the table with plastic or paper if you’re worried about paint or glitter mess.
Step-by-step instructions
Step 1: Make the card base
Fold the black cardboard paper in half. This will be the base of your Valentine’s card.
Press the fold firmly so the card sits flat when opened.
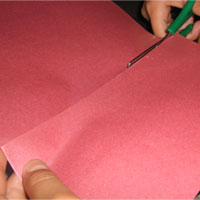
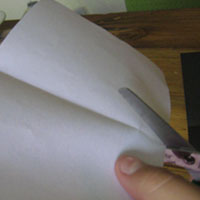
Step 2: Cut the coloured paper
Using a ruler and pencil, measure and cut:
- Two light pink squares measuring 7 cm × 7 cm
- One dark pink square measuring 7 cm × 7 cm
An adult can help with measuring if needed.
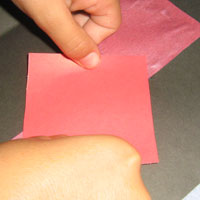
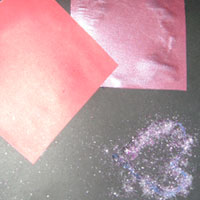
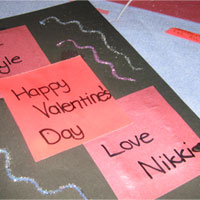
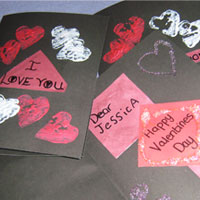
Step 3: Glue the light pink squares
Paste the two light pink squares onto the front of the card, placing one in each corner, slightly away from the edges.
These will later hold your written messages.
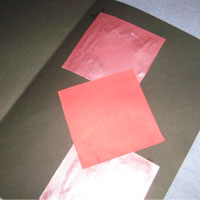
Step 4: Add the centre square
Paste the dark pink square in the centre of the card, as shown in the example.
This helps balance the design and gives the card a strong focal point.
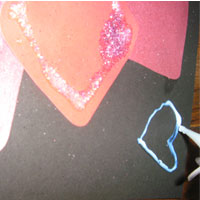
Step 5: Add glue and glitter
Using jewel glue, create simple patterns in the black spaces between the pink squares.
While the glue is still wet, sprinkle glitter over the glue. Allow it to sit for a few seconds, then gently tap the card over the glitter container to remove the excess.
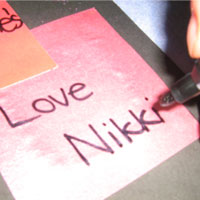
Step 6: Write your messages
Write your Valentine’s messages inside the pink squares using a permanent marker.
Children can keep it simple or get creative — short messages work best.
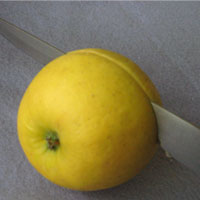
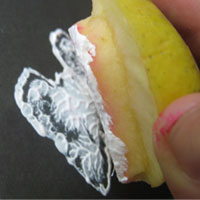
Step 7: Prepare the apple
While the glue and glitter are drying, cut the apple in half.
This step should be done by an adult.
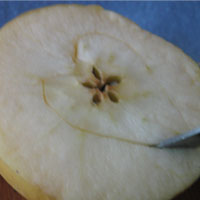
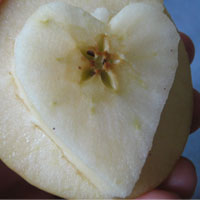
Step 8: Create the heart stamp
(Adult help required)
Ask an adult to help carve a heart shape about 1 cm deep into the centre of each apple half. Carefully cut away the surrounding apple flesh so the heart shape stands out.
This raised heart will become your stamp.
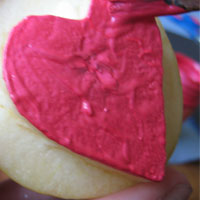
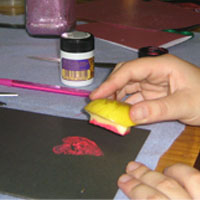
Step 9: Stamp the card
Paint the raised heart shapes using pink and white paint.
Press the apple stamp gently onto the front of the card to create patterns. Make sure there is enough paint on the stamp each time before stamping.
Children often enjoy mixing colours or alternating stamps.
Step 10: Make the message label
While waiting for the paint to dry, take a leftover piece of pink paper and write “I LOVE YOU” on it.
Cut it neatly once finished.
Step 11: Finish the card
Once the paint is completely dry, glue the “I LOVE YOU” message onto the front of the card.
Let everything dry fully before giving the card to someone special.
NOTE: This card can be used for other occasions, just carve different shapes into your apple. Other colours of cardboard can also be used.
TIP: When putting glitter onto your glue, pinch a little bit of glitter at a time and place it over your pattern. Allow to stick for a few seconds, and then gently tap your card over the glitter container, to ensure tidiness.